DIY & Crafts: Make Your Own Decoupage Monogram
Getting married is a big step in a relationship. You go from being your own person to sharing everything from rent and bills to food and furniture! When two become one and you join households it can be an exciting experience. Neither of you has a long and lonely drive back across town at the end of the night, nor do you have to worry about going long distance.
To celebrate your marriage and moving in together, commemorate things with a special accessory that encapsulates the relationship you have shared together.
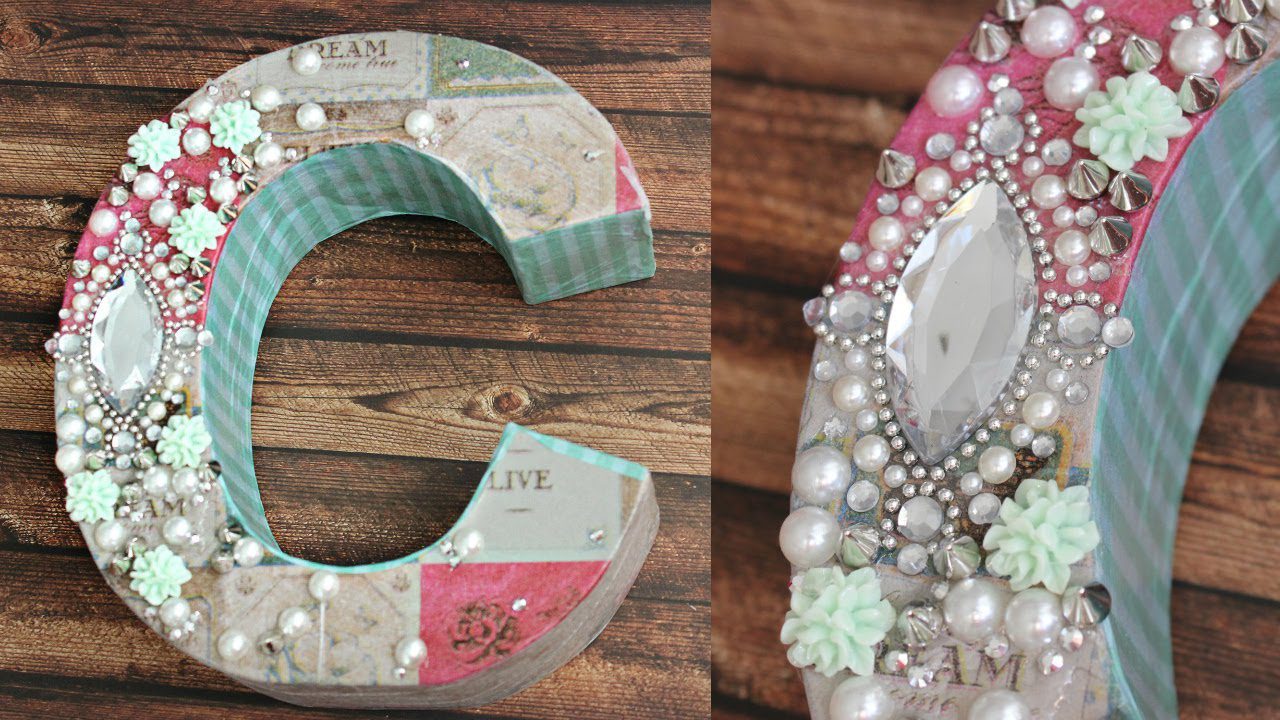
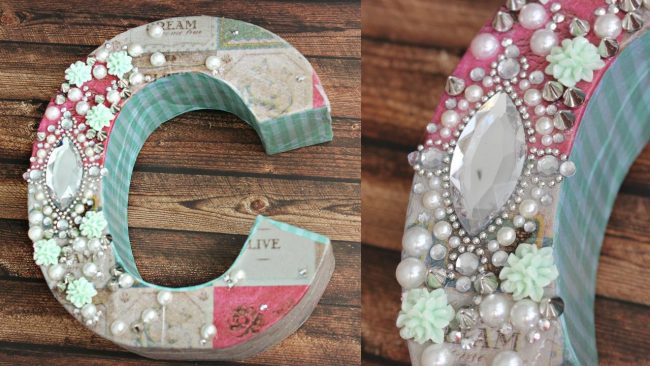
The Decoupage Monogram
Celebrate your relationship the way you two know how: together. After you get married and you learn more about each other’s tastes and styles, it’s time to decorate. There should be one wall in your home that represents the both of you, and you can do it simply with a decoupage monogram. Here’s how!
Materials Needed:
- Cardboard letters: These will be the two letters of you and your partner’s first names
- Scissors
- Scrapbook paper (assorted colors and patterns)
- Mod Podge
- Paint brush
- Command strips
- Measuring tape
- Photographs: These should be images of the two of you doing things together
Directions:
Step 1: Cut the scrapbooking papers to fit the size of the cardboard letters. Visit here to learn how to scrapbook.
Step 2: On a flat work surface, flip the scrapbooking papers over. Apply a light coat of Mod Podge with your paintbrush. Firmly press the scrapbooking papers to the cardboard letters. Set aside and let dry.
Step 3: Once the cardboard letters have dried, cut your photos to fit on the cardboard letters.
Step 4: Arrange the pictures on the cardboard letters in a pattern or in sequence. Play with the organization of the photos until you find an arrangement you prefer. You could start one letter with the first images of the two of you as a couple and end the last letter with where you want to go. The style of the lettering is completely up to you.
Step 5: On a flat work surface, flip the photos over in the arrangement you have chosen. Using the paint brush, apply a coat of Mod Podge to the backs of the pictures. Carefully affix the images to the cardboard letters.
Step 6: Apply another light coat of the Mod Podge to the surface area of the cardboard letters. Set aside and let dry.
Step 7: Measure the area of the wall on which you wish to hang the finished cardboard monogram. In the middle of the measurement, stick a Command hook to the wall. You may need to use two or more hooks, depending on the size of your cardboard monogram.
Step 8: Once the monogram has dried, hang it on the wall. Take a step back and admire your crafty project; you just completed your first home improvement project! Give each other a high five!
If you can make an arts and crafts project together without an argument, imagine what other home improvement projects you can take on together. Besides, even if an argument does ensue, you can talk it out and work on your communication skills; there’s no way you can’t win!
Here is a quick YouTube video if you need further instruction or ideas…