How To Paint Laminate Countertops with Daich SpreadStone Countertop Paint
Are your counters in need of some serious updating? Are you sick of looking at the same color? Do you have ugly laminate countertops that are totally getting in the way of that modern farmhouse kitchen style you so desperately want to achieve? Getting bored in quarantine and want to do a little DIY project that will make a big impact? Or do you just want to update your kitchen without taking out a loan? If you answered YES to any of these questions, keep reading because we are going to tell you how to paint your laminate countertops with Daich SpreadStone Countertop Finishing Kits!
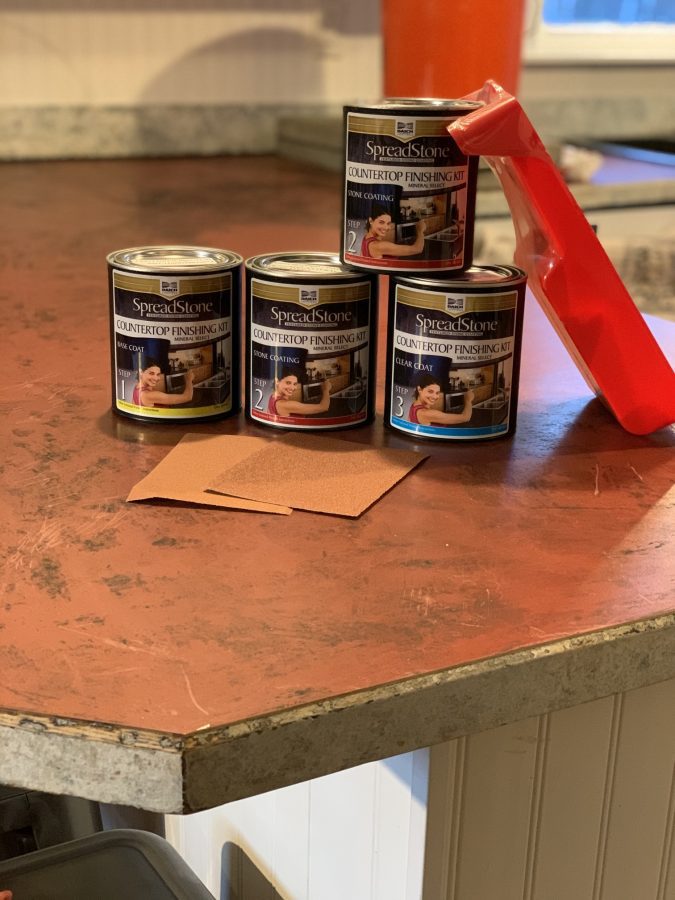
What is Daich SpreadStone Countertop Finishing Kit?
Daich SpreadStone Mineral Select Countertop Finishing Kit is real stone in a unique three-step system that allows you to refinish your existing laminate kitchen and bath countertops and give it a brand new, durable surface that looks great! The process is fast and simple, doesn’t require special tools or time-consuming creative skills to achieve amazing results. Simply roll on each layer as directed to achieve beautiful and functional surfaces fast.
If you want to update your ugly laminate counters on a very small budget, you should definitely consider painting your laminate! Here’s why:
Why We Decided To Paint Our Laminate Counters In The First Place
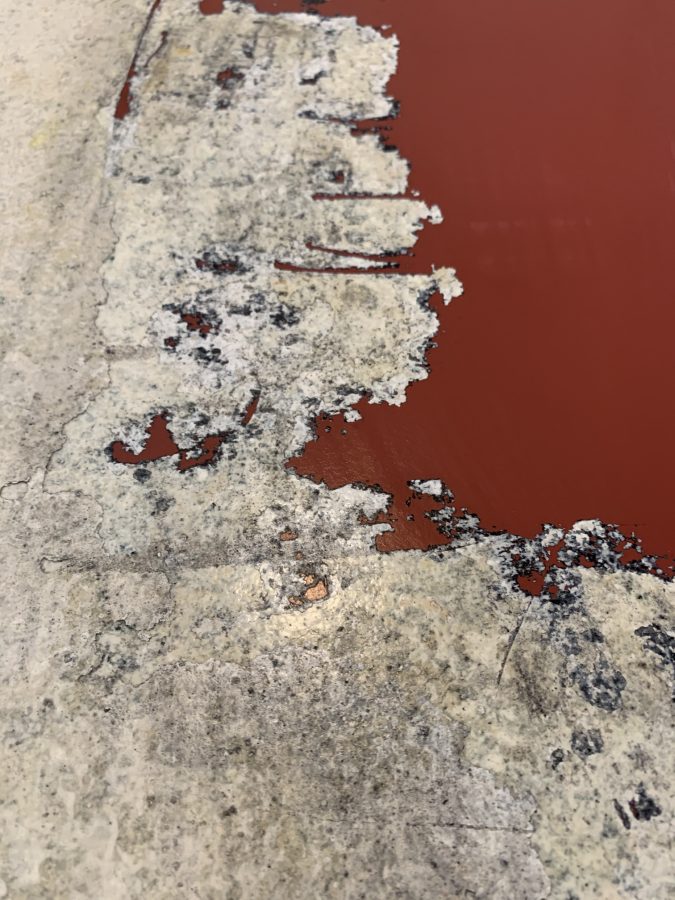
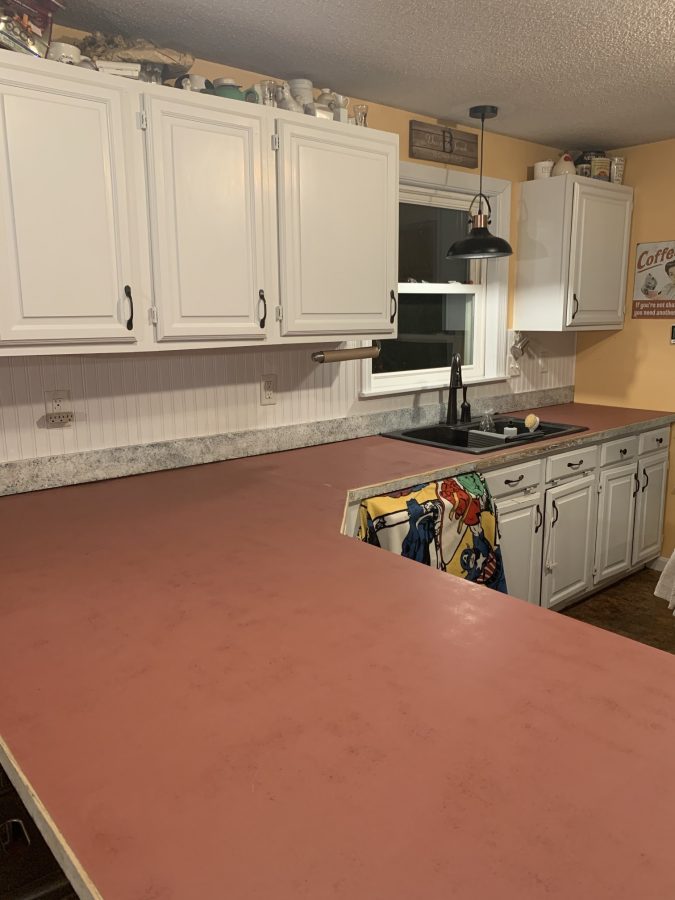
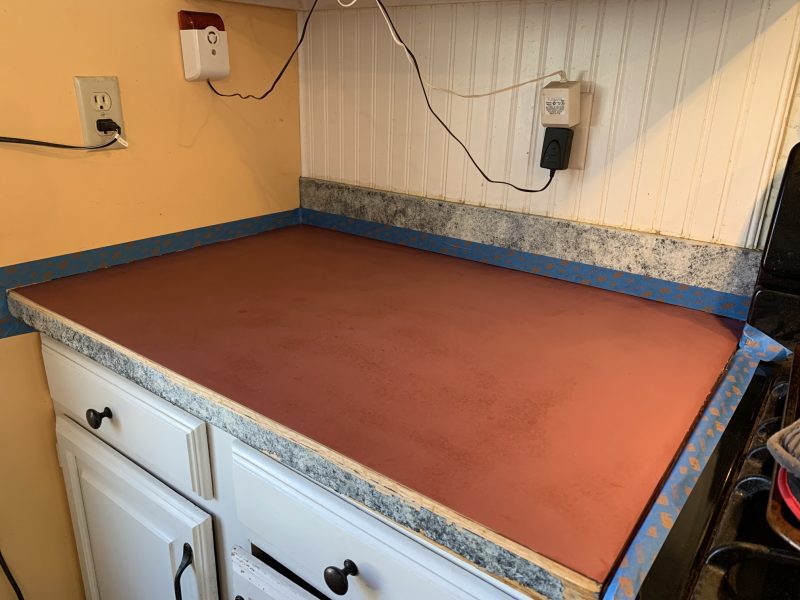
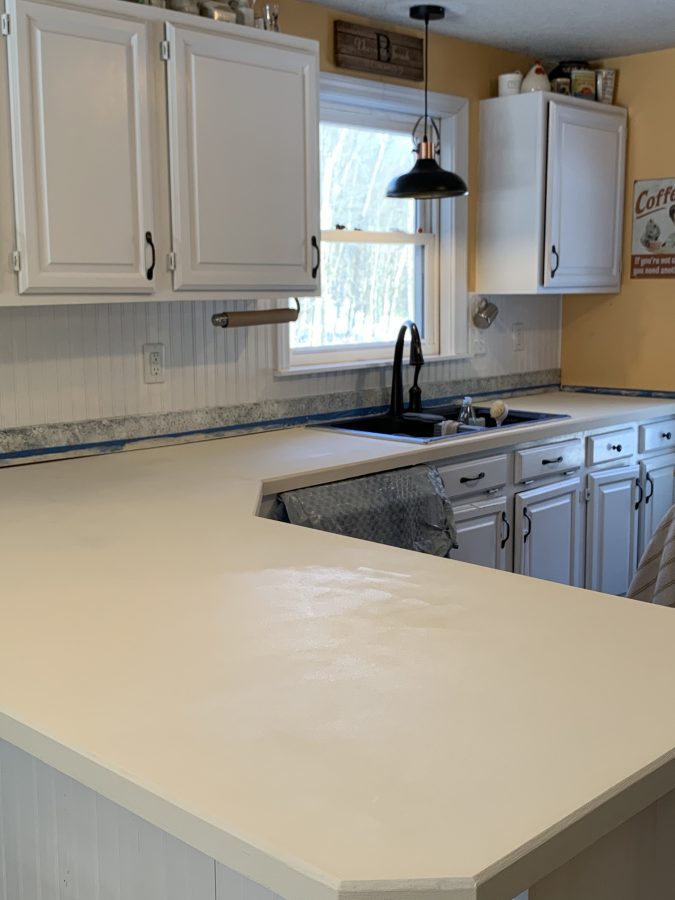
You may remember the countertop makeover I did back in 2015 when I couldn’t stand my ugly red kitchen counters another second. The countertop paint job held up really well for about 4 years, but by the 5th year and several touch-ups later, it was beyond repair and I realized I needed to strip it all off.
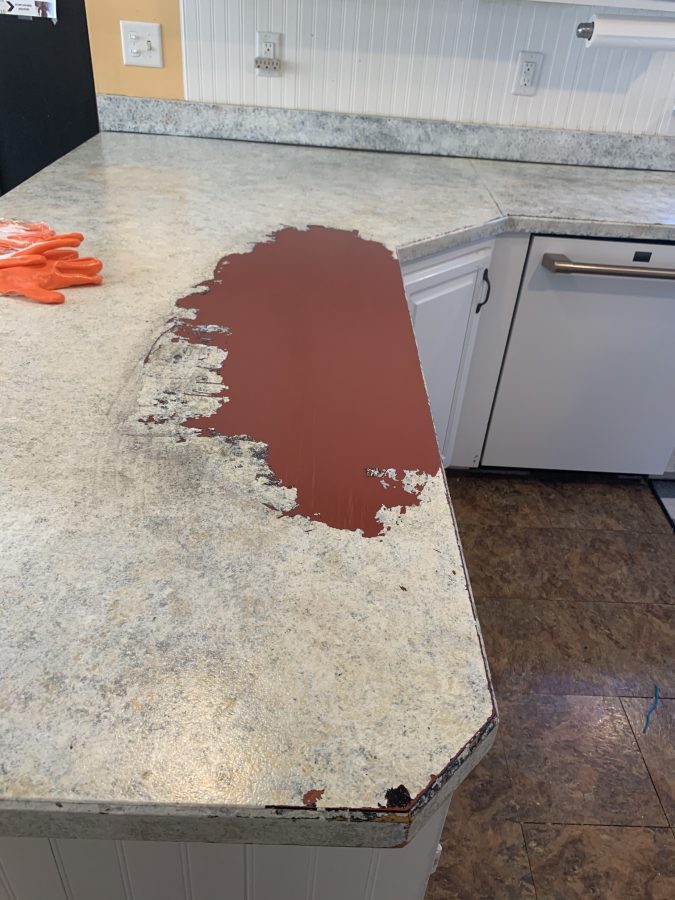
Disclaimer: I must say that while the countertop paint held up extremely well in the unused areas of the counters, the areas that got the most wear and tear (like corners and the main workspace) could not stand up to daily use from our large family of 7. On top of that, a family of 4 stayed with us for most of 2020 due to the pandemic. With 11 people putting wear and tear on the counters all day long, every day, for almost a year, the poor counters really didn’t stand a chance. Perhaps under normal use from a family of 4, the painted counters could have held up just fine for many more years. I don’t think there was anything intrinsically wrong with the other countertop paint, I think we just put more wear and tear on it than was recommended.
Once a huge area (the main countertop workspace) had worn down and peeled off with daily use and washing, my husband and I decided it was time to tackle another DIY project!
We still didn’t want to invest in new countertops since we are saving up for a complete kitchen remodel, so we decided to strip the old countertop paint off and try something new.

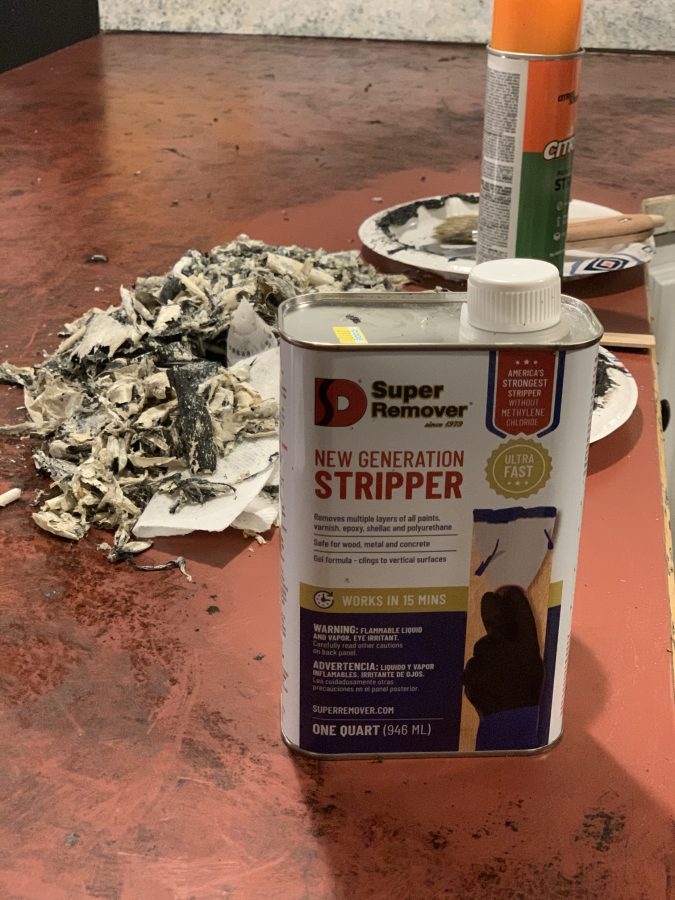
I’m going to write a whole post about how to remove countertop paint from laminate and show you the rest of the pictures and videos we took of the process and how we turned what could have been a disaster into a simple removal process! Stay tuned for that later!
Now… on to the painting!
Phase 1: The Prep Work
The first thing you need to do before you open your kit is the prep work. If you have old countertop paint on your counters that you need to remove, that’s a whole entire project on its own (see above).
If you just have untreated laminate, MDF, plywood, particleboard, concrete, or tile surfaces, then go ahead and start Step 1 – The Prep Work.
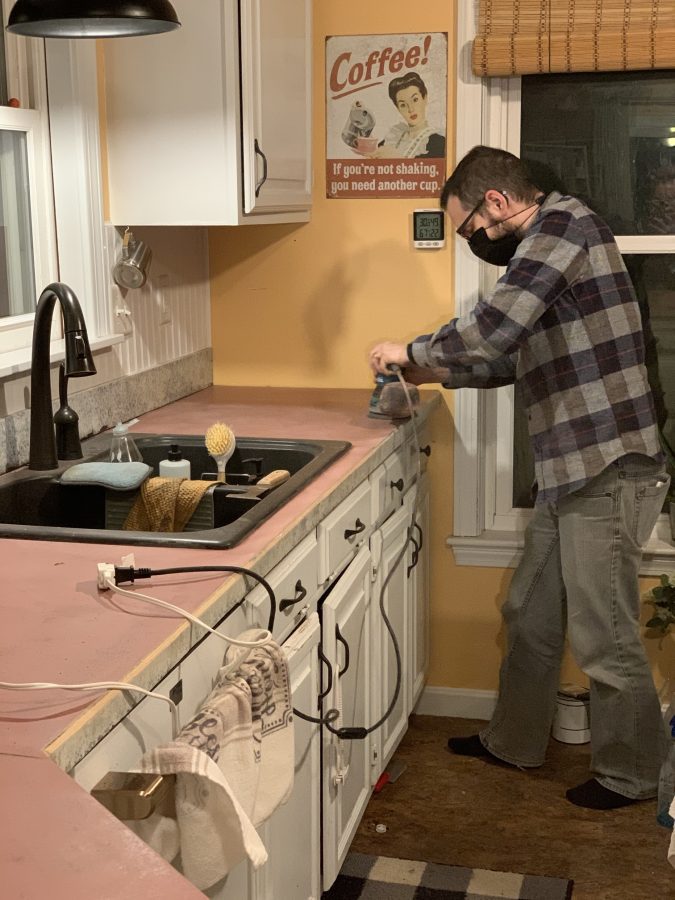
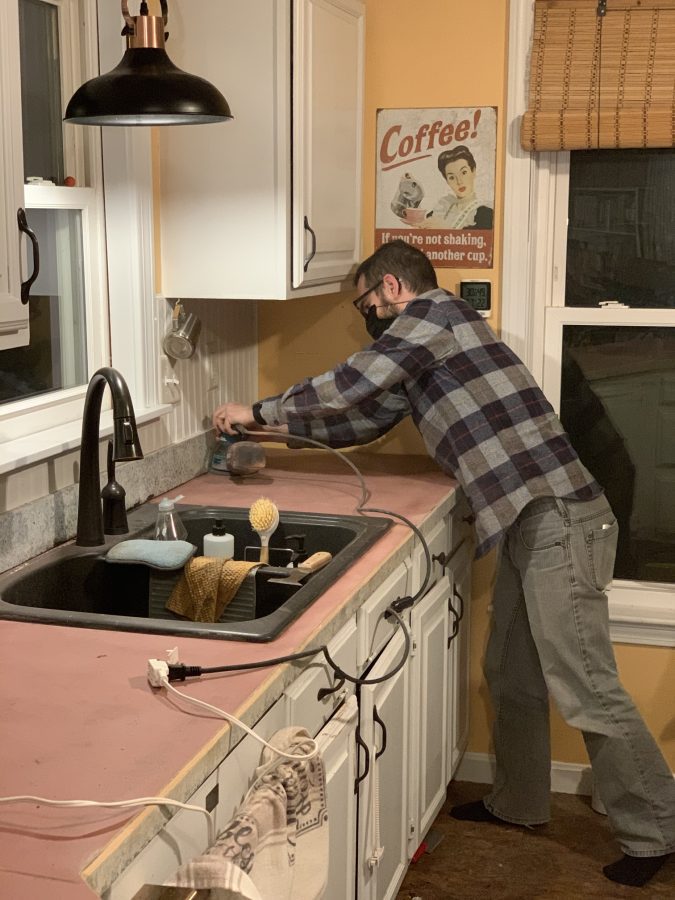
Wash down your countertops with mild soap and water and let dry completely. Then you’re going to sand the crap out of your counters to make sure they are roughed up and ready for paint. The kit comes with sand paper that you can use for this step, but I HIGHLY recommend using an orbital sander.
Thankfully, my husband did most of the work for this leg of the project! When he was done sanding all the counters, I vacuumed up all the dust and washed everything down to prepare for Step 2 – The Paint!
Phase 2: The Paint
While this step might be optional, I recommend taping everything off with regular blue painter’s tape so you don’t have to be so careful with your cutting brush. Tape off sinks, walls, appliances, backsplash, etc to just makes everything easier on yourself! It’s worth the extra $5 and 10 minutes of time it will take you to do this step.
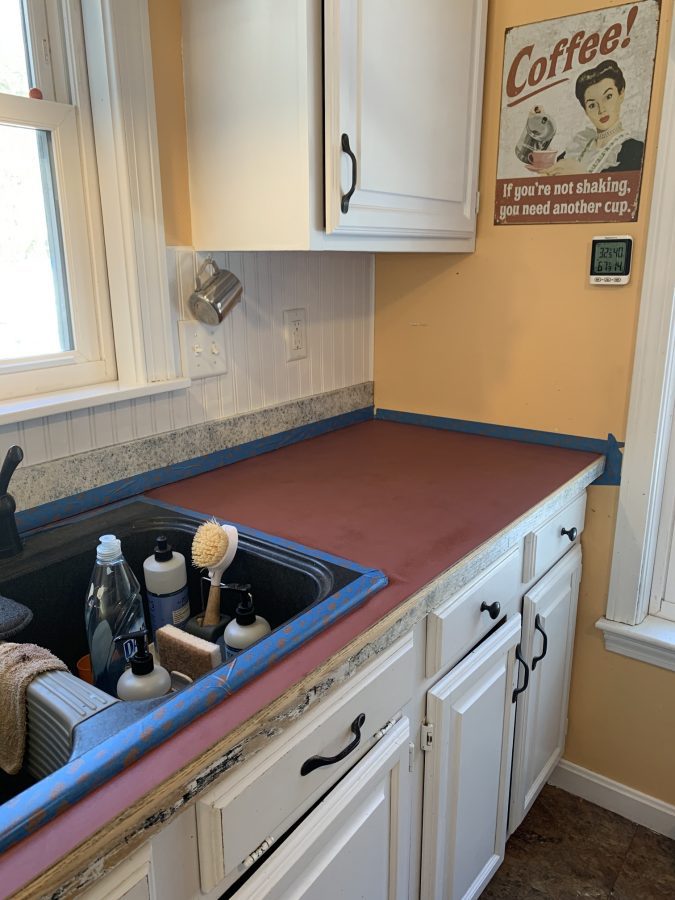
Next, it’s finally time to GET DIRTY! Okay, hopefully, you won’t get dirty, but do yourself a favor and wear some crappy clothes that you don’t mind getting a little paint on, just in case!
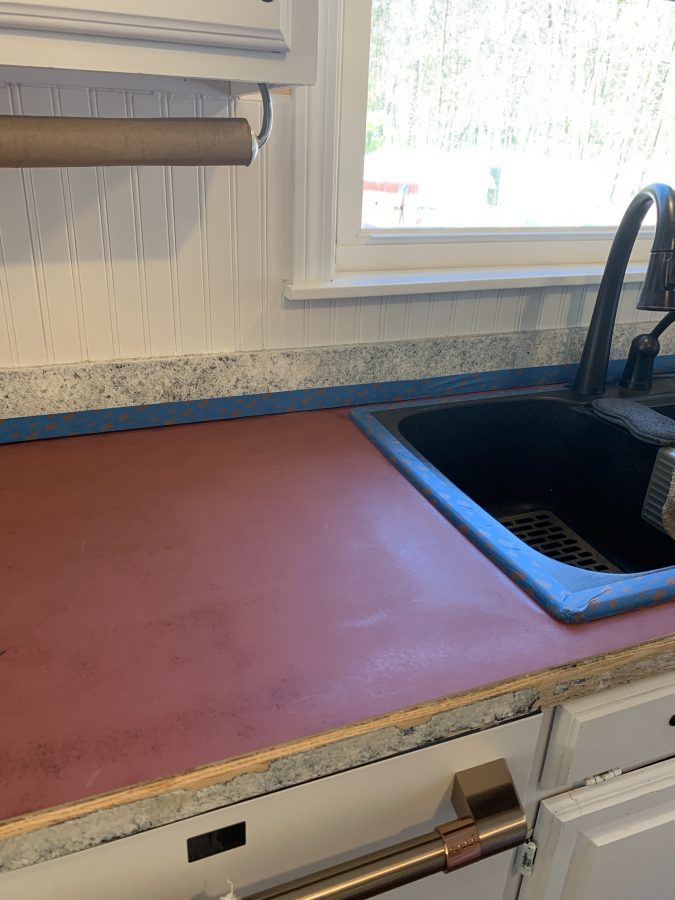
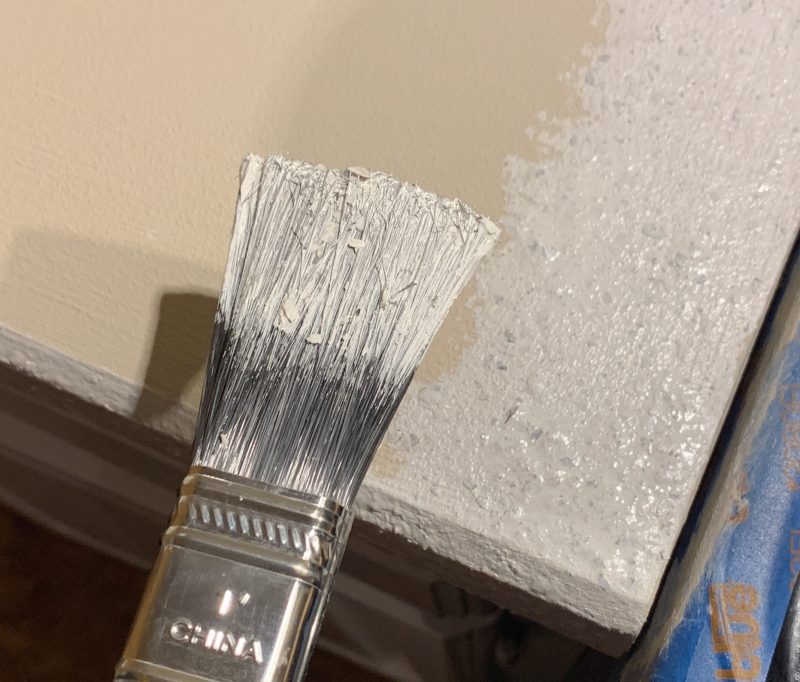
Step 1 – The Base Coat

Step 1 is the Base Coat. This stuff looks like mayonnaise and spreads like it too. It’s thick, gloopy, and looks gross, but I promise it’s a critical component of the SpreadStone Countertop Finishing Kit.
Start by putting a thin coat all along the edges with your paint brush. Once all the edges and hard to reach spots are painted, use the roller to cover the remaining areas. I did my first coat really thin like I do when I apply gel nail polish.
I let that dry for like 3 hours and then applied a second, more even coat to my countertops.
I could still see my red counters showing through a bit so I asked Daich about putting a third coat of the base coat and they said go ahead. So the next day, I went ahead and put on a third coat of the base coat to all my counters. That did the trick! It ended up even, uniformed, and no show-through. Voila! Step 1 done!
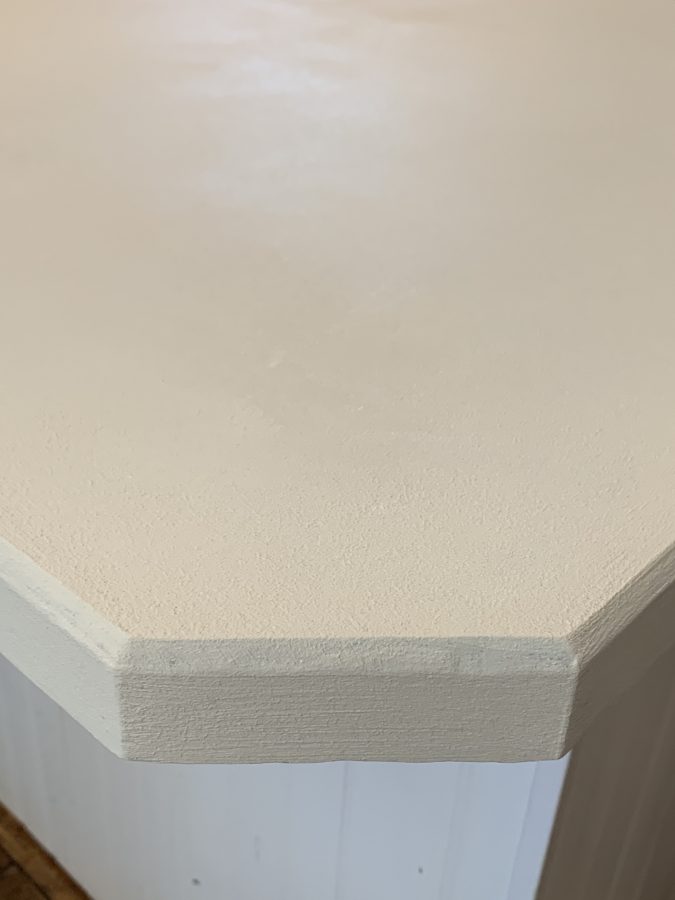
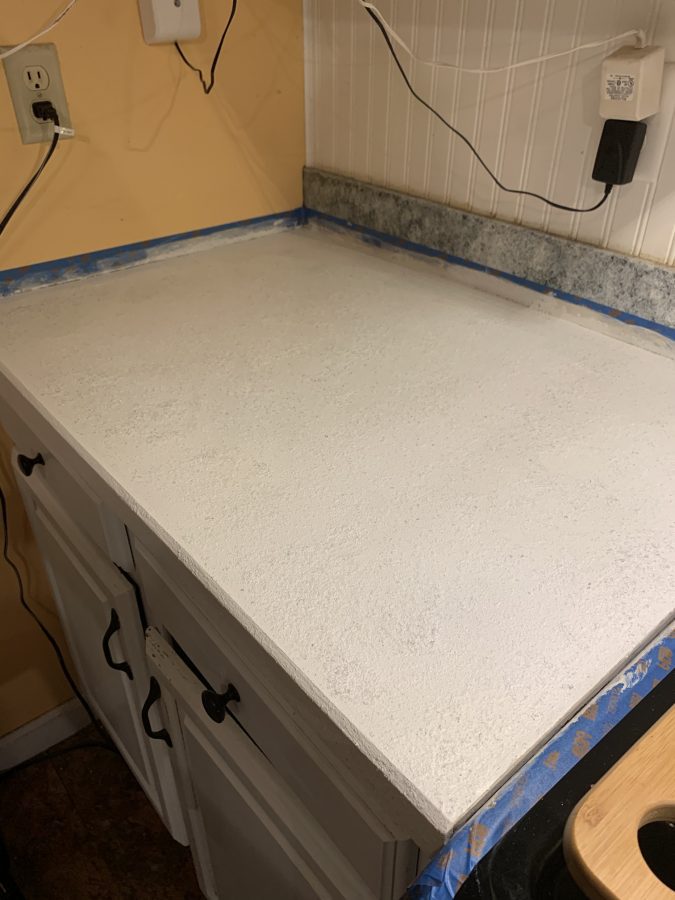
You can see from the closeup pic above that it’s nice and even with a rough texture. It kinda feels like a pumice stone to the touch once it’s dry.
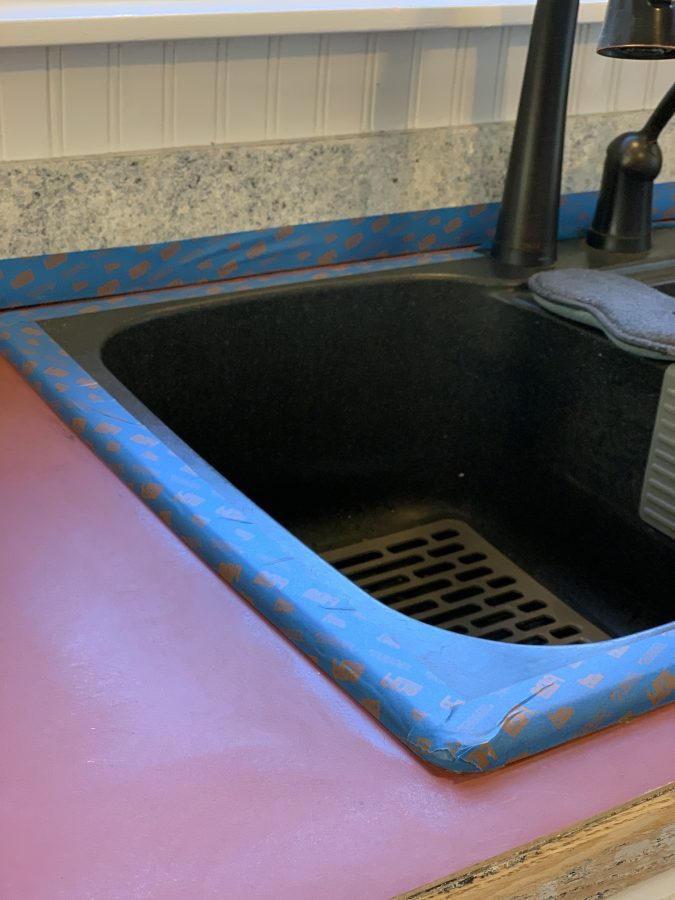
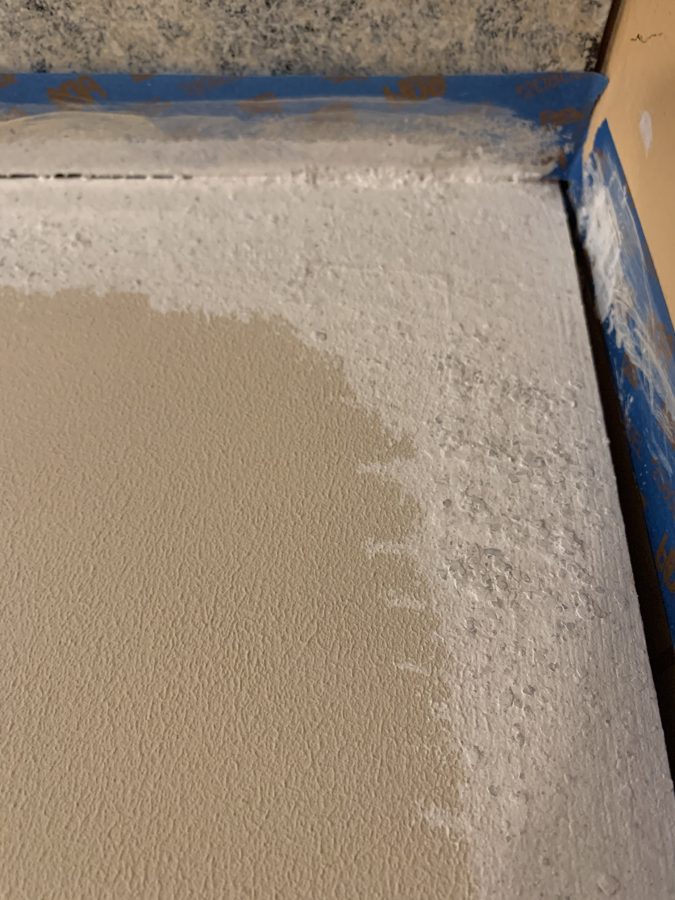
Step 2 – The Stone Coating
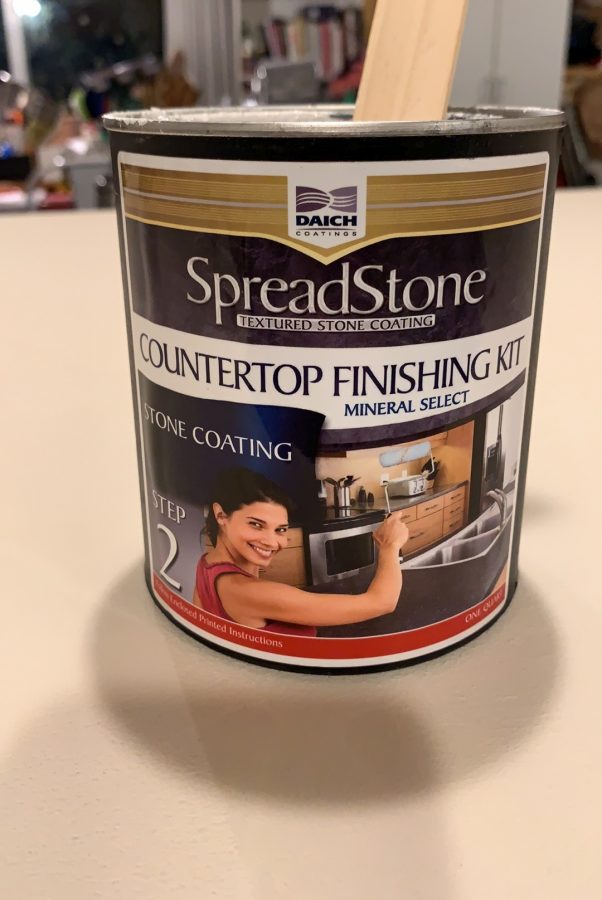
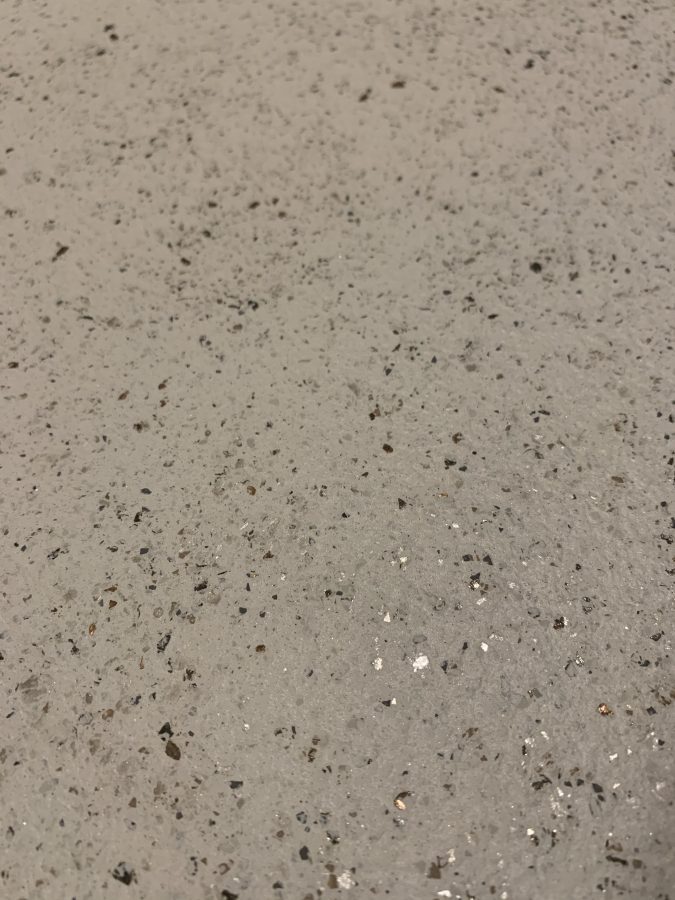
Okay, now step 2 is the Stone Coating. This is the fun part. This crap looks like tartar sauce and it spreads on like it too! I’m not kidding, this stuff is thick and lumpy and just weird looking! You will wonder what the heck you have gotten yourself into when you open the can and stick your brush in.
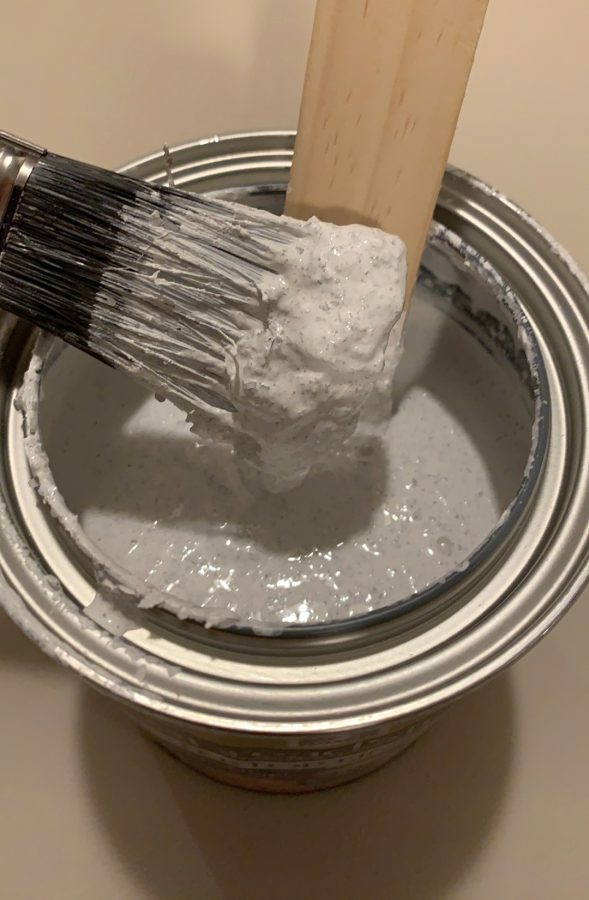
It’s a little tricky at first because you are like “Oh my gosh what the heck do I do with this stuff?!” but you get used to it right away and will find that it’s easier to apply than you think.
Just like with step 1 base coating, you are going to apply it to all the edges and hard-to-reach places first and then use the roller to apply it to the rest of the surfaces. It’s easier to apply it with the brush than the roller, but you will quickly learn the amount of pressure to apply with the roller to get it to spread evenly instead of clumpy.
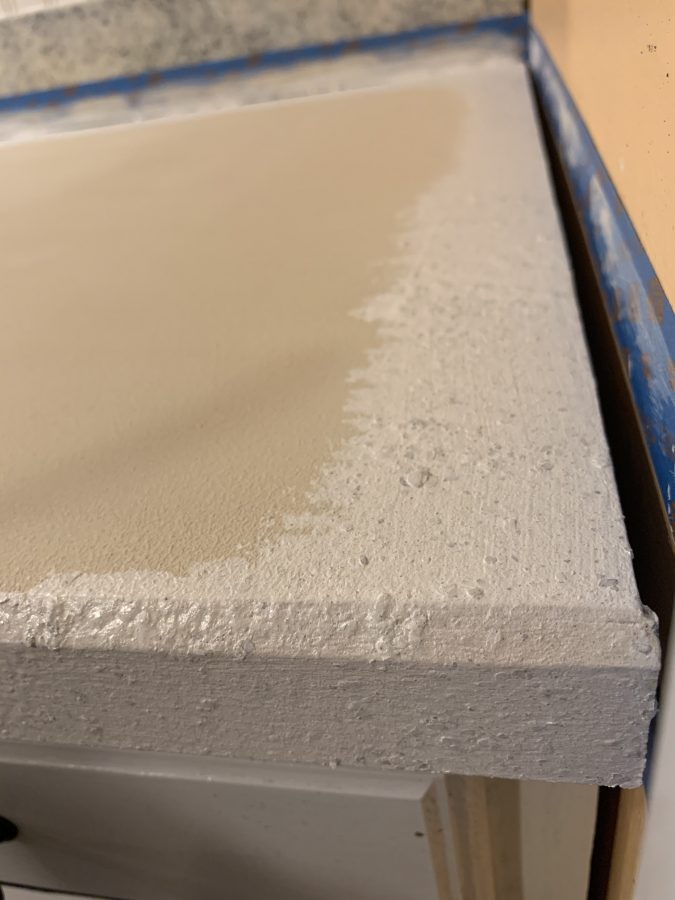
When you are rolling it on, you want to be careful that it doesn’t clump up anywhere because it has all these little flat pieces of stone in it. If you apply too much paint in one area, it will bump up and make the sanding process a little more tricky. Plus you don’t want to “waste” the stones in one area and end up with the stone flakes being really thin in another area. So just do the best you can to make this gloopy stuff go on evenly! I found that sometimes dragging the roller without it actually rolling helped to spread the globs of stone to other areas so I could even it out.
I know it doesn’t look like much yet, but I promise it’s worth it!
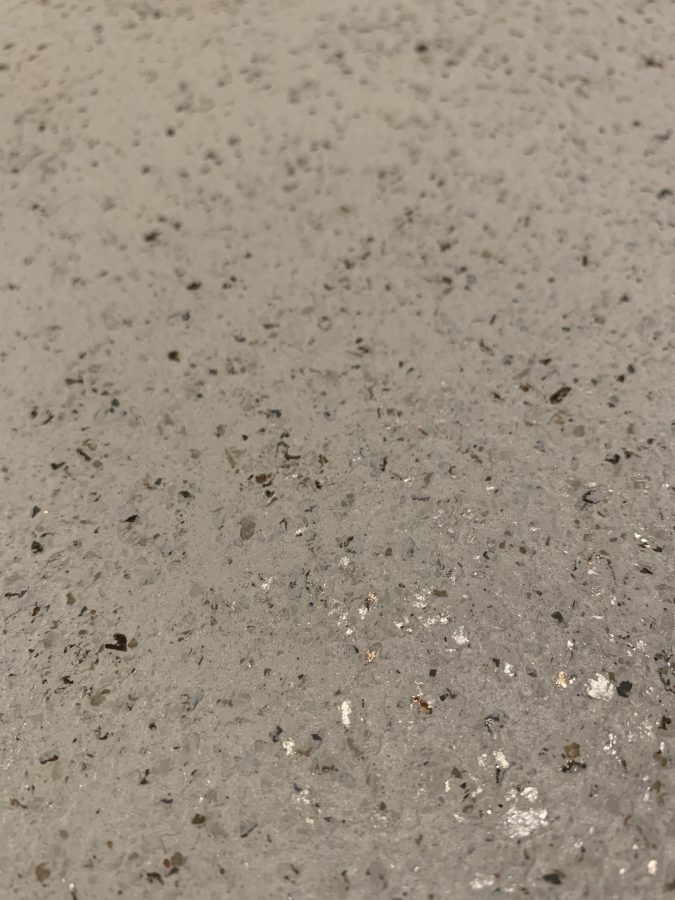
Let this first coat of stone coat dry for a few hours before you apply a second coat. The second coat is probably the most important because you want to make sure all those stones are not clumped up anywhere that you missed with the first coat. Doing this in full daylight is best so you can look at it from all angles to make sure you don’t have any too thick or too thin areas.
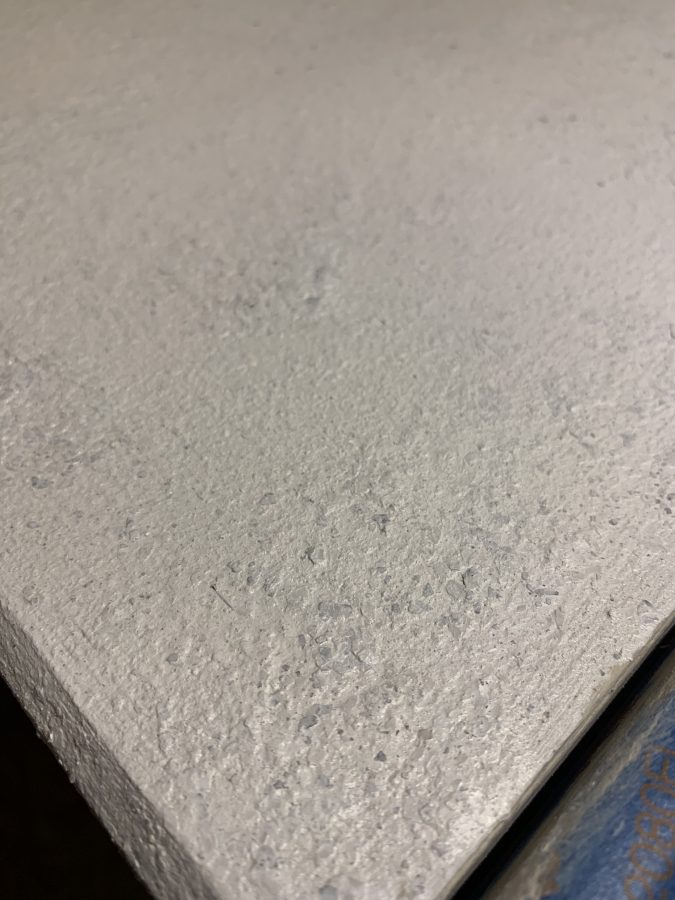
That’s what the first coat looked like after it dried. (above)
And that’s what the second coat looked like after it dried. (above)
I determined that I had applied it too sparingly (again) and decided to do a third coat. I don’t think you can put too much of the step 2 stone coat because a bit of it gets sanded off in the next process. Just makes sure you let it dry completely between coats.
There! That’s perfect!
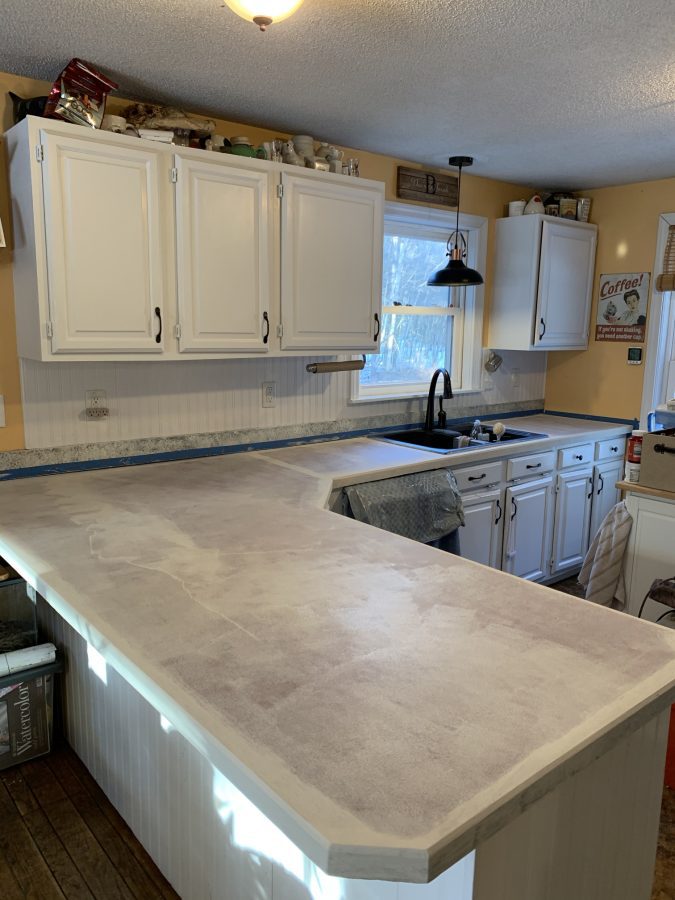
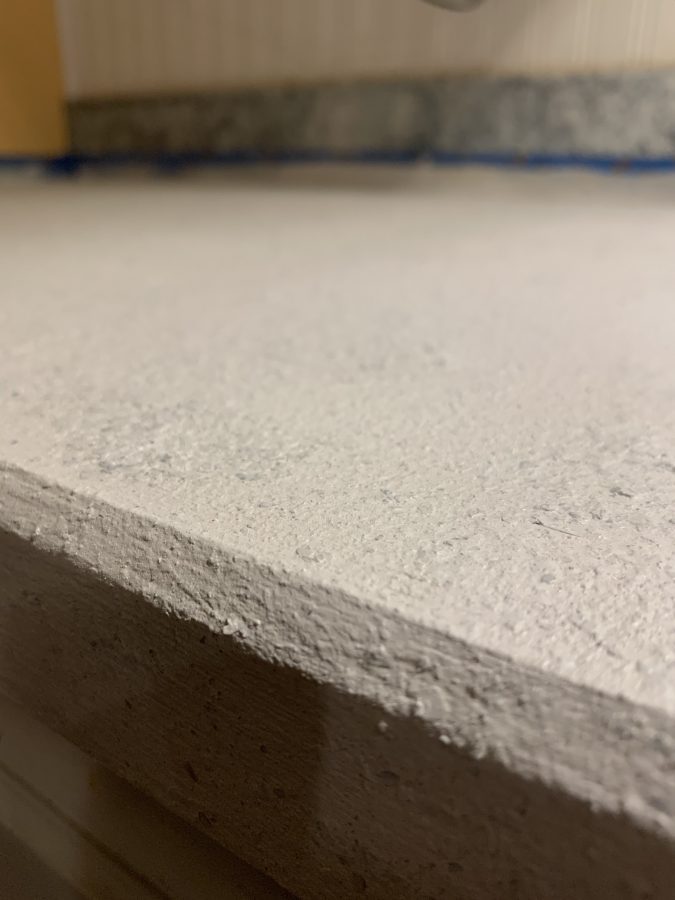
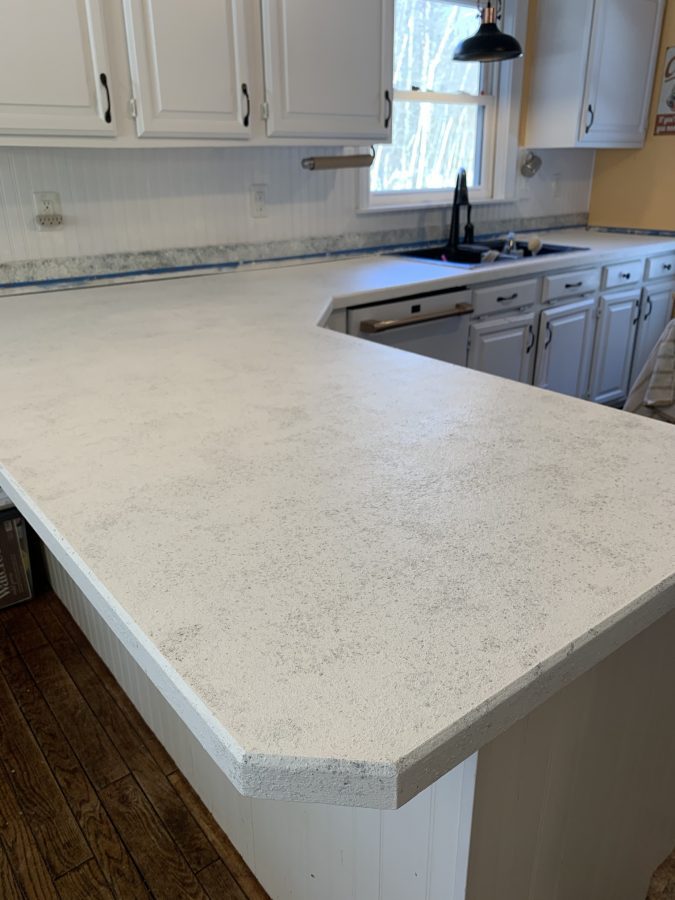
The final texture is extremely bumpy, very rough to the touch, and looks like you painted your counters with kitty litter. Don’t worry, it won’t stay like this.
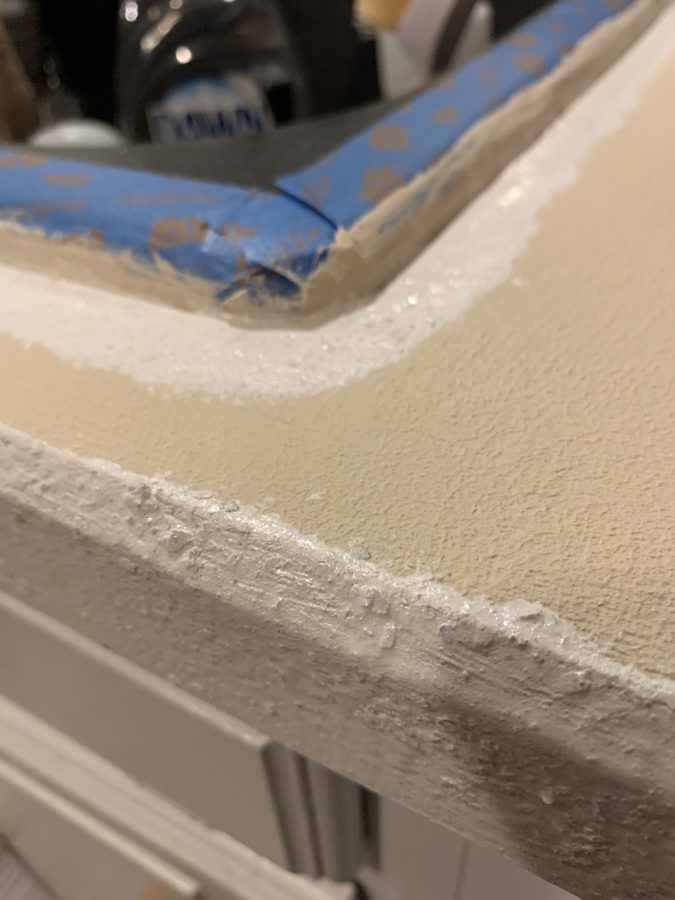
Step 3 – The Top Coat
Once your step 2 stone coat layers have completely dried, it’s time to prep for the top coat. Oh, did you think you could just throw on the top coat and now you’re done? Uh uh, not so fast! The hard part is next! (Well, it’s only the hard part if you don’t have an orbital sander like I told you to get earlier…)
Take your orbital sander (or prepare to get a serious bicep workout) and gently begin to sand the crap out of your counters.
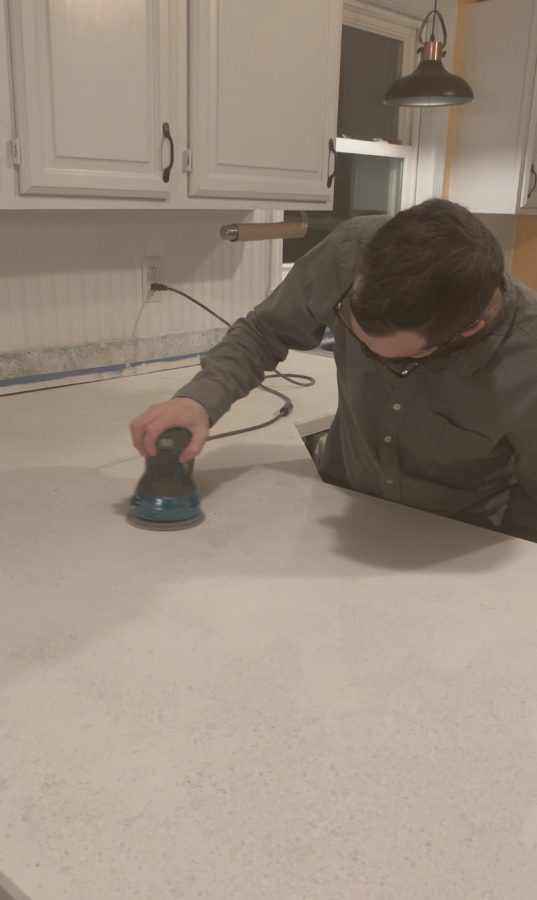
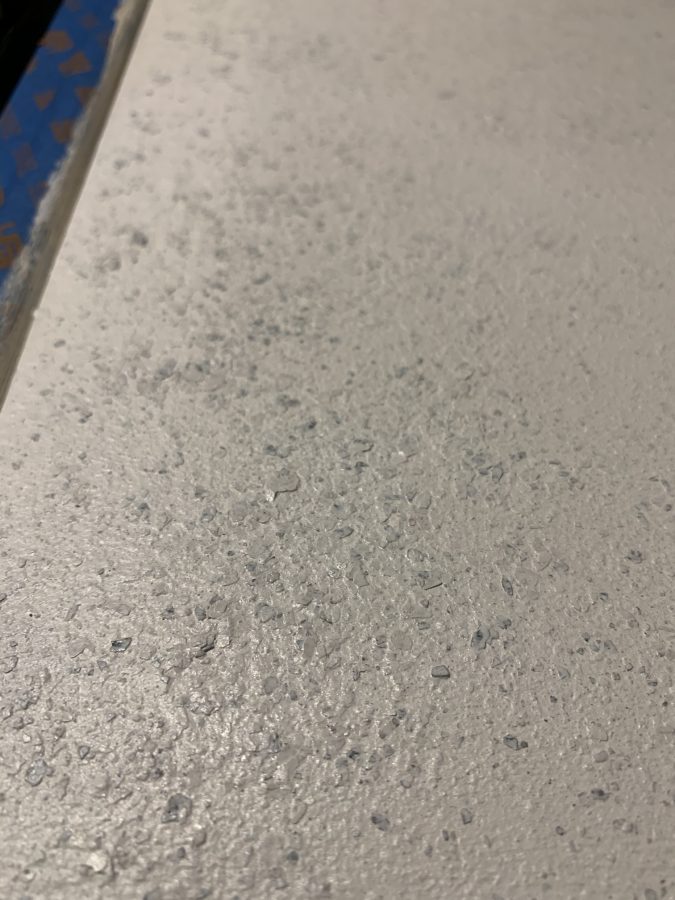
You are going to sand it till it’s smooth to the touch and all the little “stones” are now shiny speckles of different colors.
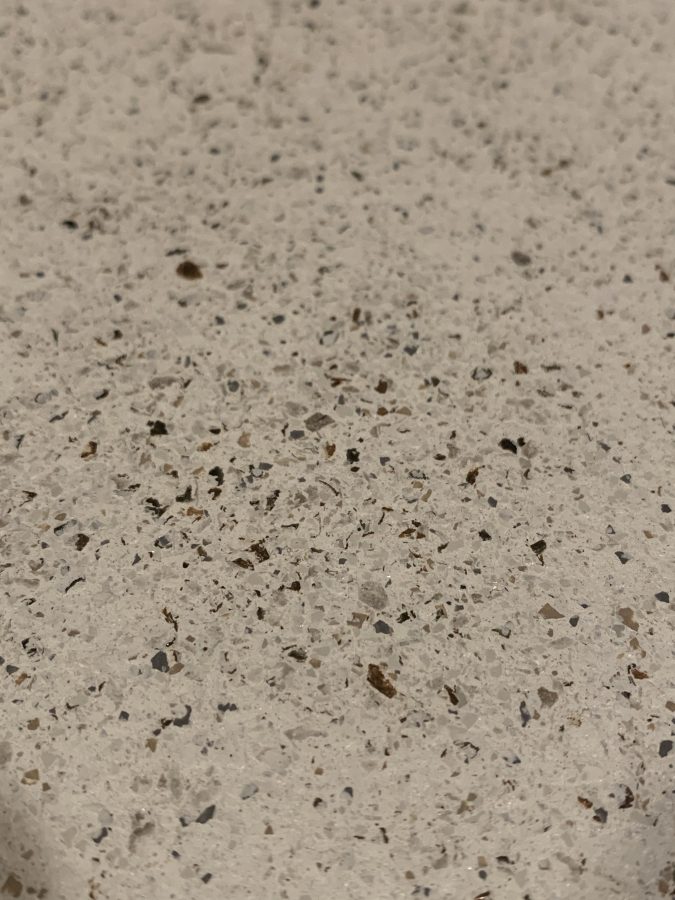
So instead of looking dull and bumpy your counters will transform into a smoother texture with sparkly specks throughout. See, isn’t that better?!
NOW it’s ready for step 3, the clear coat!
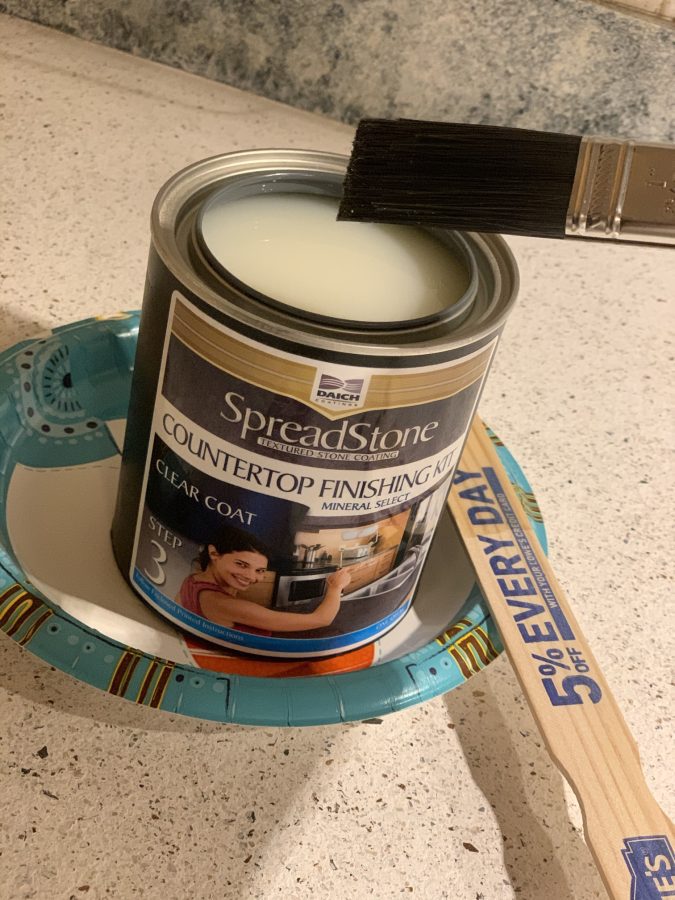
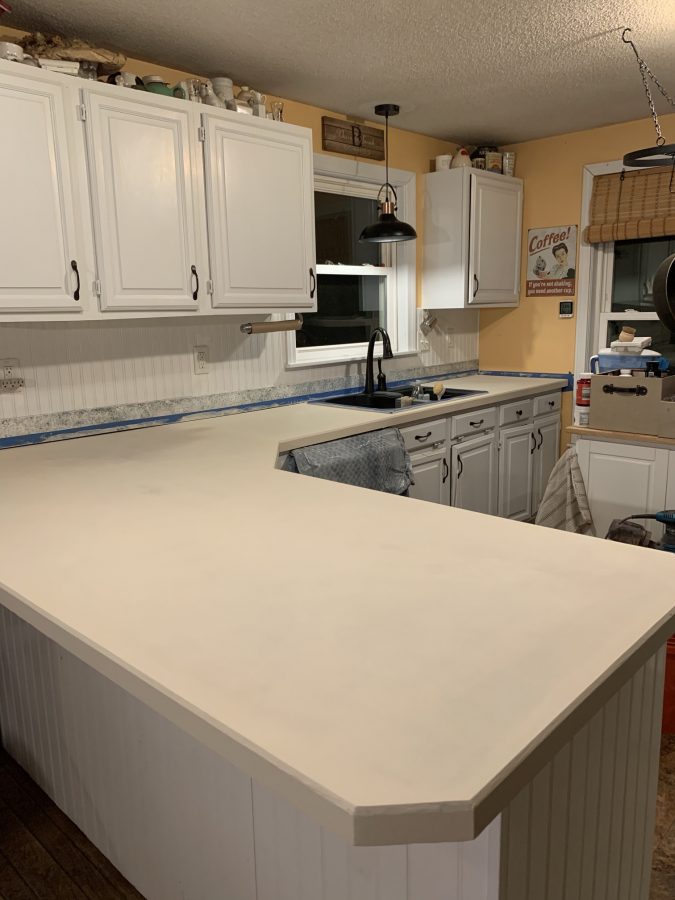
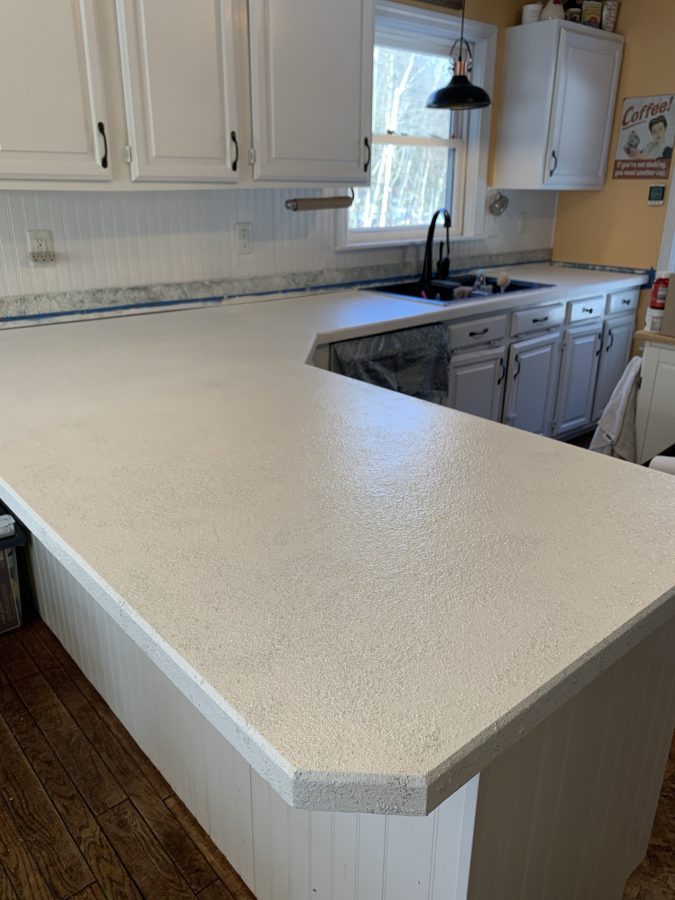
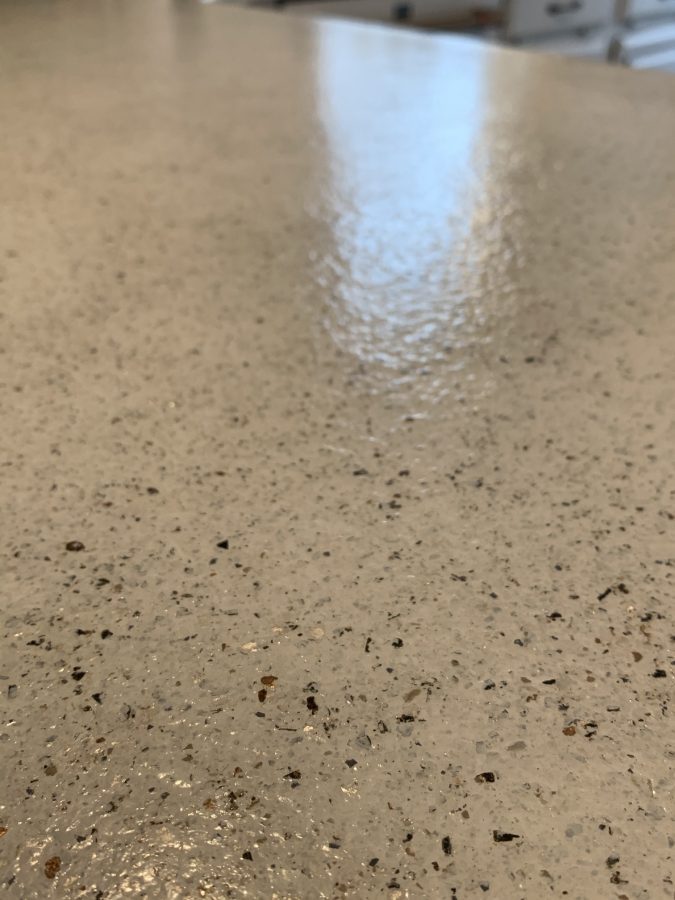
Finally! Some normal looking paint! This stuff is like nail polish top coat, goes on smooth, silky, and leaves a beautiful high-gloss shine! It totally brings everything together and makes you feel like the whole project was all worthwhile as you are applying it. It’s just so satisfying applying the glossy top coat onto the bumpy matte surface and watching it transform.

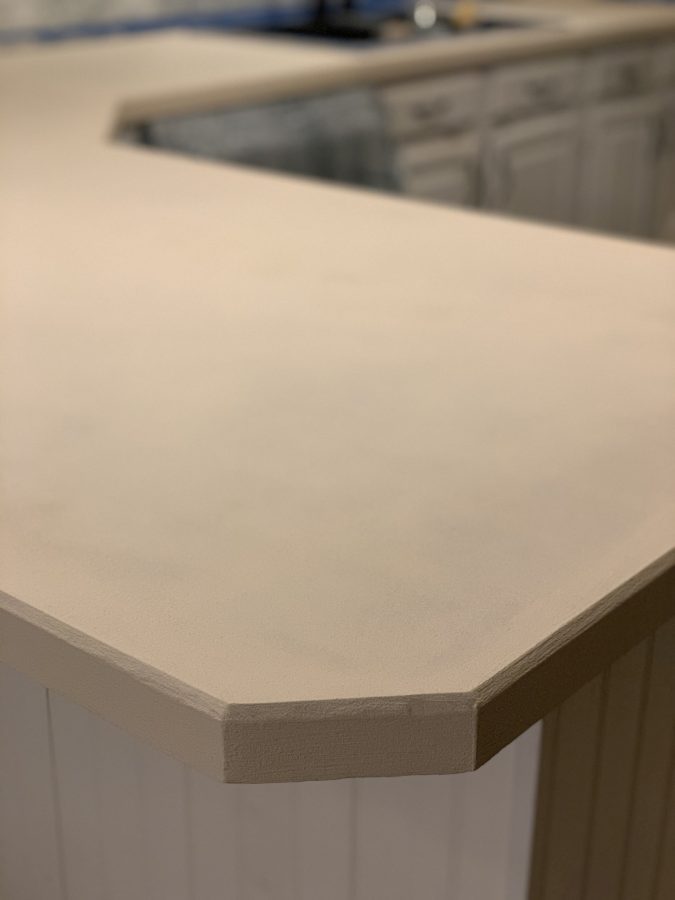
(You can see in the picture above on the corner there, I sanded it a little too much and the wood edge of the counter showed through. I ended up realizing this only after taking this picture. I then touched it up before applying the second top coat. You can see the final results further down!)
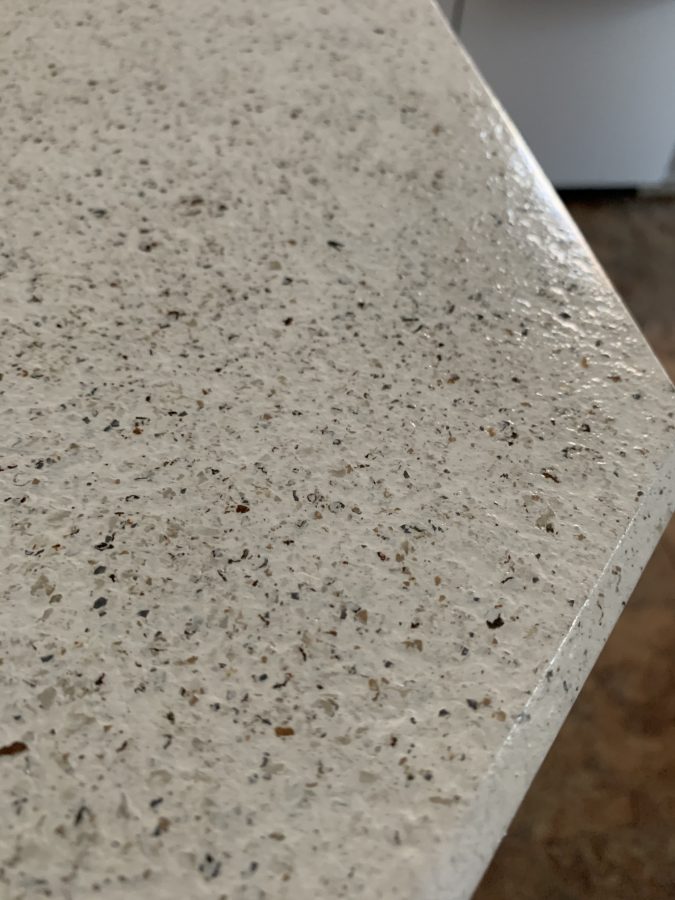
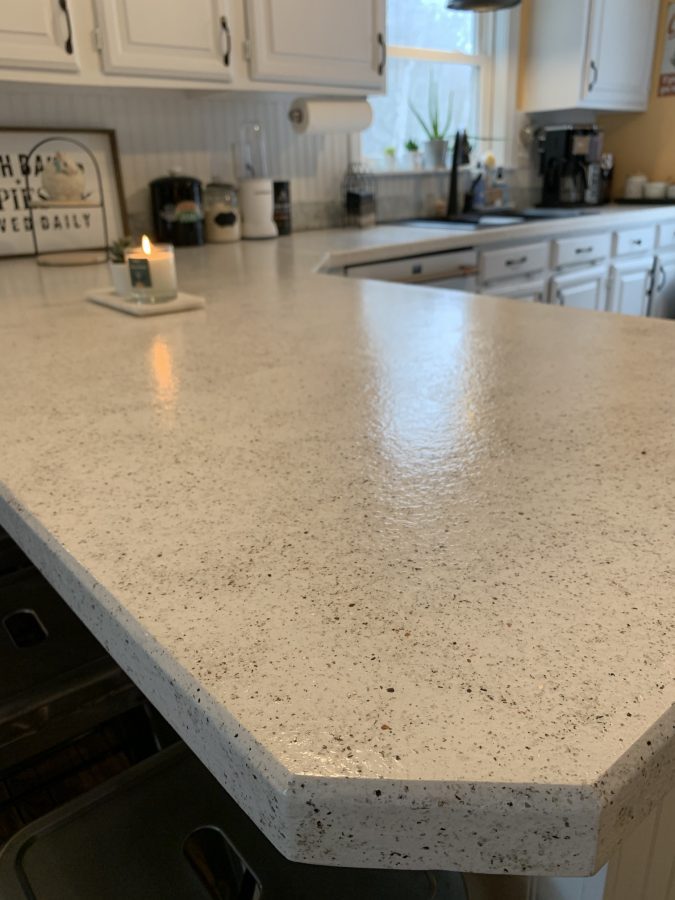
Just look at that lovely texture, the beautiful sparkle and that SHINE!! Isn’t it just beautiful?!
I ended up doing THREE clear coats with approval from the “senior product manager” at Daich. During the final clear coat, right as I was doing the most important part of the counter, the electricity went out. It was extremely windy and we later found out a tree hit the power lines down the road from us.
Being the trooper that I am, I didn’t skip a beat. I just kept the roller moving – slowly and evenly – in the pitch-black darkness! I yelled to my 10-year-old son who used his phone’s flashlight to find me a headlamp before I ran out of paint and needed to reload my roller.
Surprisingly, I managed to finish the counter by the light of my headlamp without screwing it up! I don’t want to toot my own horn, but I’m pretty badass.
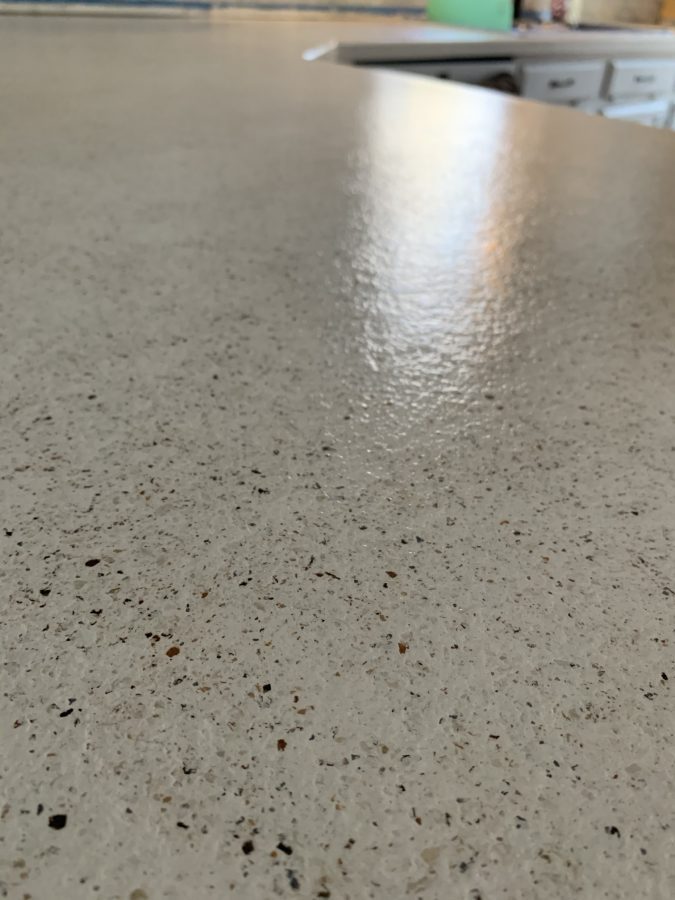
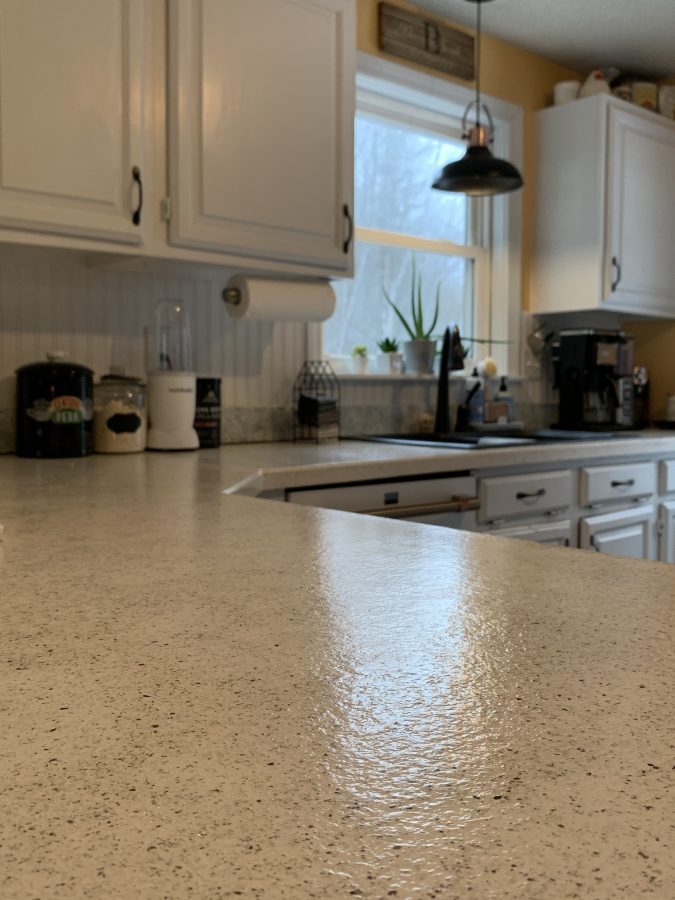
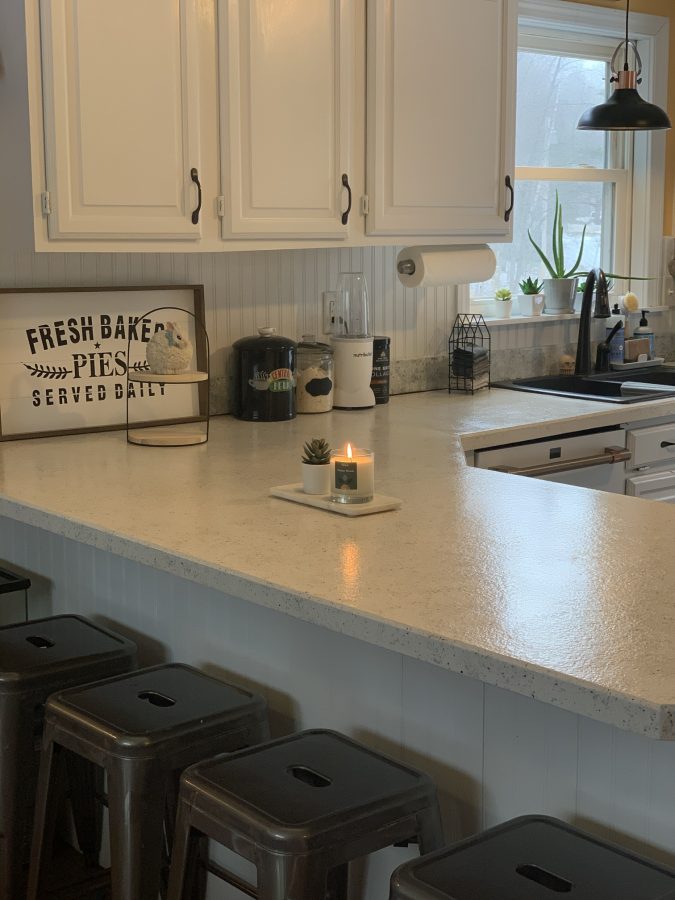
Just look at it! Smooth smooth smooth!!!!
AND NOT RED.
That’s the most important part.
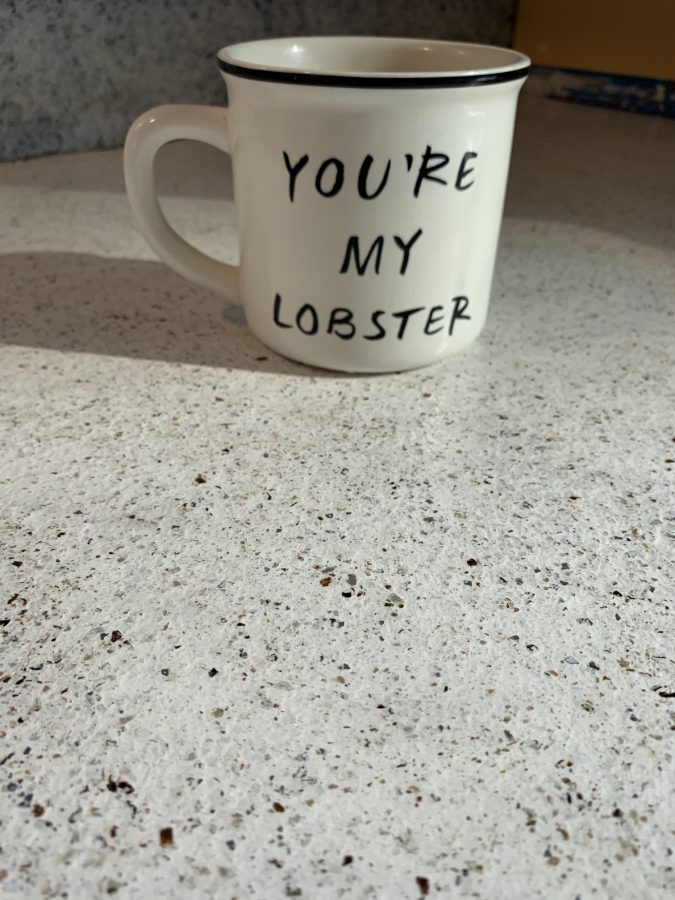
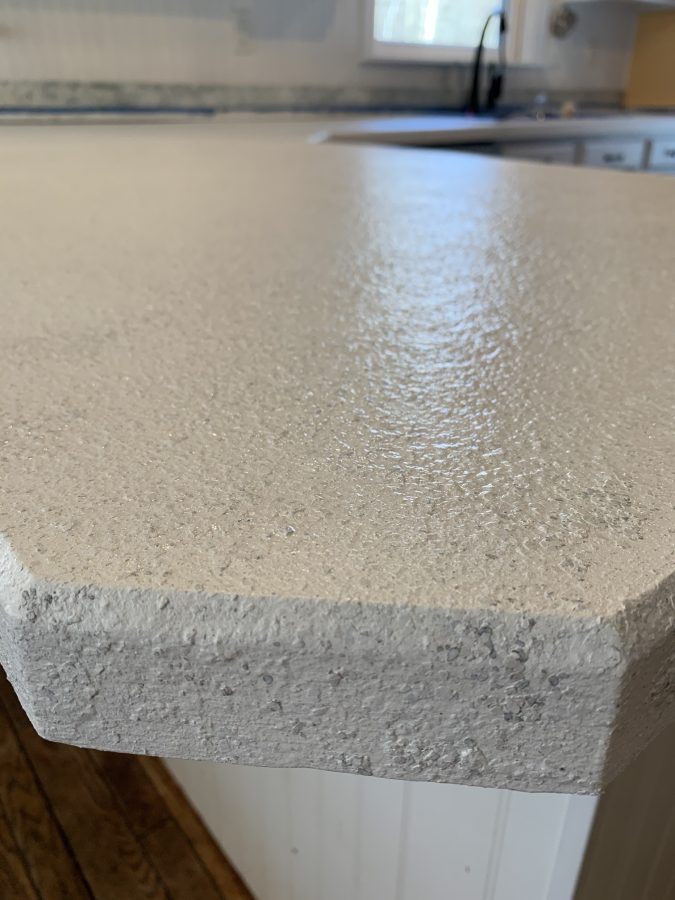
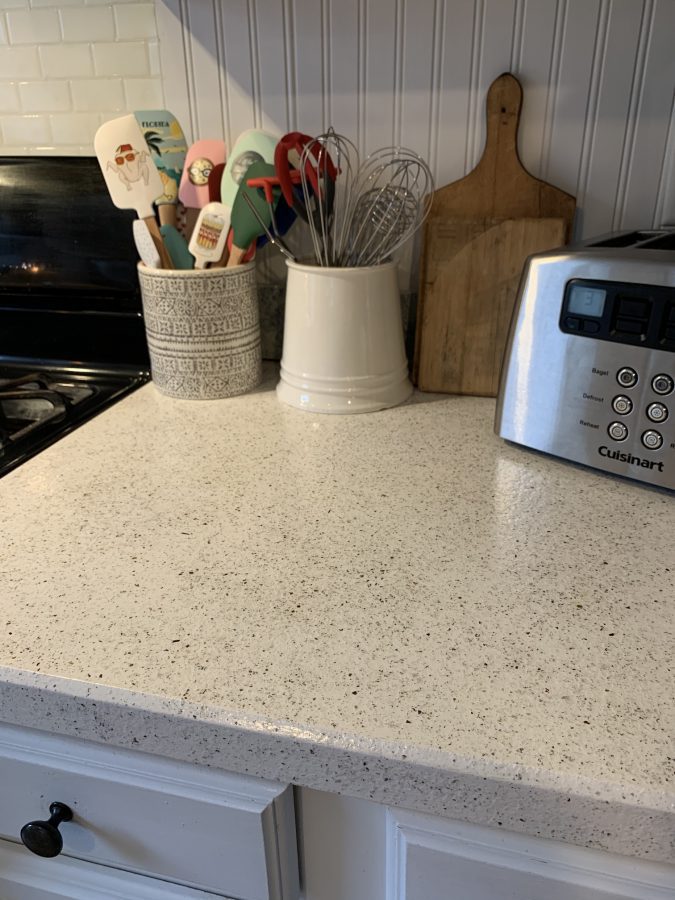
Super awesome Pottery Barn Friends mug is for size reference so you can see how big the specks of stone are in the counters surface. Absolutely gorgeous in the natural morning light. The end result is quite beautiful, smooth yet slightly textured like an orange peel, and has a high-gloss finish.
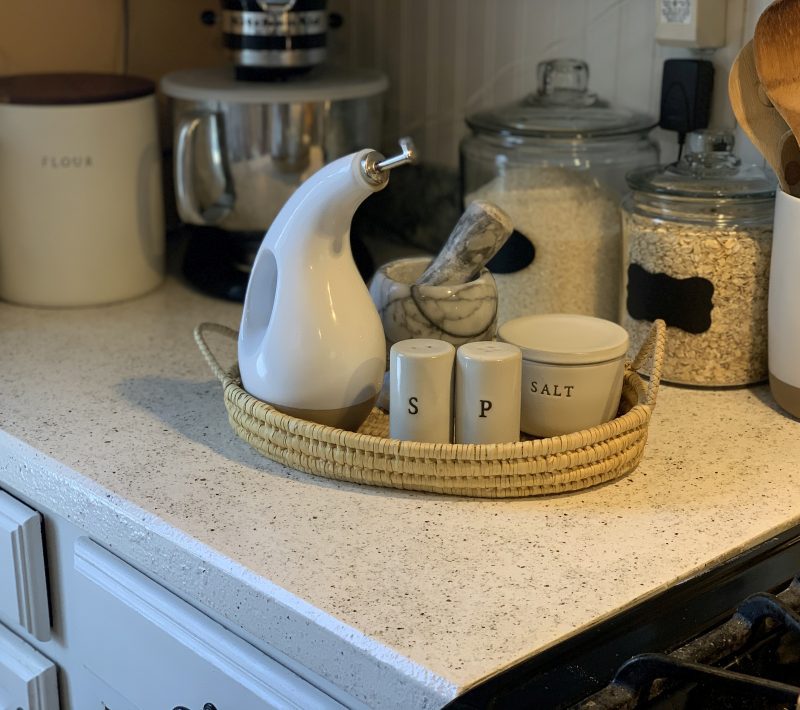
The kit says to wait at least 24 hours for the last clear coat to dry before gently using the counters. They take a full week to cure completely. Definitely wait the full 7 days before you put heavy things like your KitchenAid mixer or flour jars on the counter or you might end up with dents.
You can see the slight texture at certain angles in the daylight. I was able to capture it in this picture above, but it’s generally undetectable.
That’s it!
New Counters In Just 3 Easy Steps!
It was a lot of work and between a full-time job, 5 children, homeschooling, and regular daily life, it took me and my husband about a week including the weekend on either side of it to finish this project from beginning to end. That includes stripping the old paint off the counters first.
Normally, this project wouldn’t take more than 3 days tops if you were taking your time. I think it would be a weekend project for most people! Trying to do this in between taking care of 5 kids ages 18 months to 13, is what made it a little bit of a challenge, but we DID IT! And it’s beautiful!
I’m so glad we went with Daich SpreadStone Countertop Finishing Kits!
Don’t you think it turned out beautifully?!!!
Now It’s Time To Do YOUR Counters!
Daich SpreadStone Countertop Paint
$
112.50
/kit
- Normally
$125.00
Currently on sale for $112.50 at Home Depot
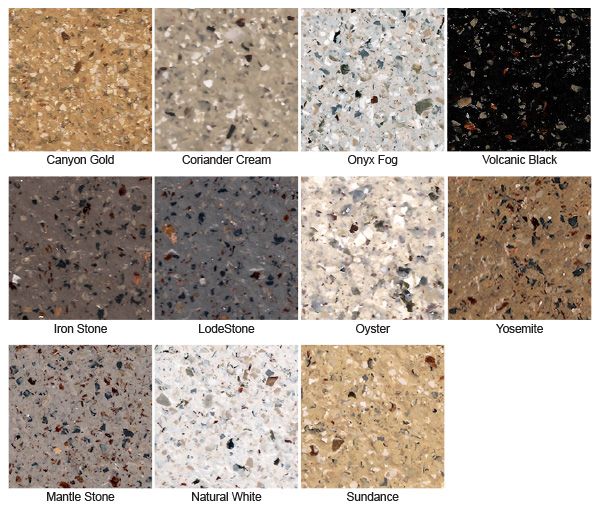
Choose from 10 beautiful colors of Daich SpreadStone Countertop Paint – there is something for everyone! We chose Natural White for our project because we wanted to continue with trying to keep everything white and clean-looking for that modern farmhouse look. All of the colors are beautiful though, and I seriously considered Mantle Stone and Onyx Fog as well.
You can get Daich SpreadStone Countertop Finishing Kits at Home Depot right now for only $112.50/kit (reg $125).
Each kit covers about 40 square feet of counter space. Our kitchen has around 50 square feet of counters, so we got 2 kits. Now, remember, I did 3 thin coats of each step so we actually used more than half of the second kit to finish the counters. I’m glad we got 2 kits of Daich SpreadStone Countertop Paint!
What are you waiting for? It’s time to tackle your own laminate counters!
Learn more at daichcoatings.com