Step Up Your Game with These Boot Sole Replacement Options
Why and When to Consider Boot Sole Replacement
Understanding when your boots need a sole replacement is crucial for extending their life and maintaining comfort. It’s not just about aesthetics; worn soles can compromise your stability, foot health, and the overall integrity of the boot.
Signs Your Boots Need a Sole Replacement:
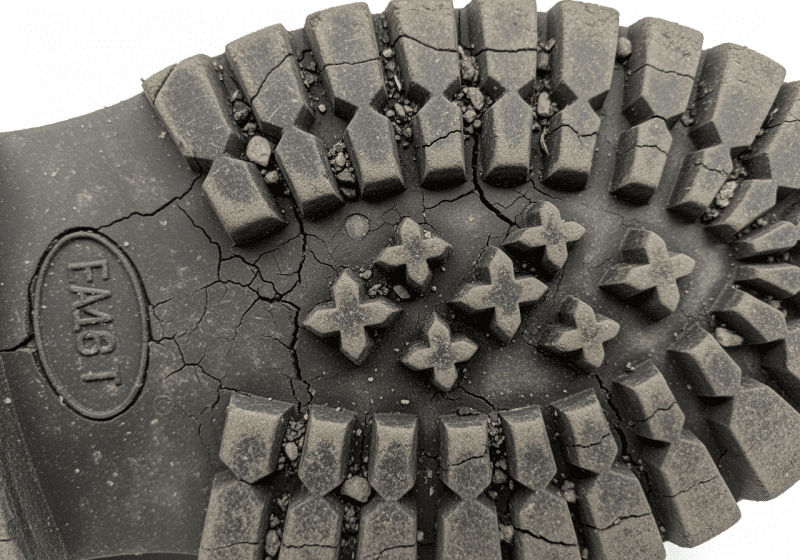
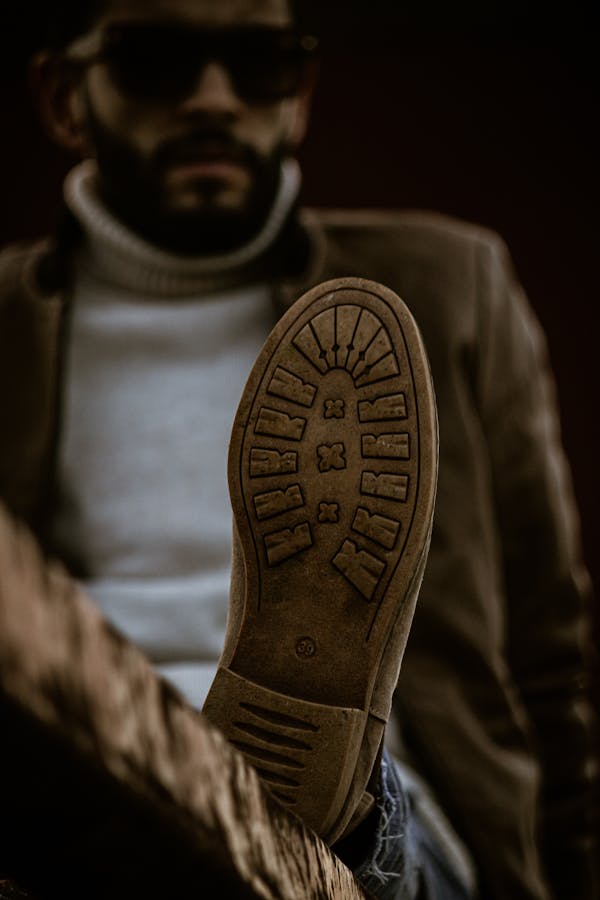
- Uneven Tread Wear: This is often the most obvious sign. If the tread patterns are significantly worn down in certain areas (e.g., the heel, ball of the foot, or outer edge), your boots are losing their grip and support.
- Holes or Cracks: Visible holes or deep cracks in the sole are clear indicators that moisture can seep in, and the structural integrity is compromised. This is especially critical for work boots or hiking boots where protection is paramount.
- Delamination: If the sole is separating from the upper of the boot, or if layers within the sole itself are peeling apart, it’s a sign of adhesive failure or material breakdown. This can lead to tripping hazards and loss of waterproofing.
- Reduced Cushioning: Over time, the midsole material can compress and lose its shock-absorbing properties. If your feet feel more fatigued or you notice less bounce in your step, the sole might be worn out internally.
Benefits of Resoling Instead of Buying New:
Choosing to resole your boots offers a multitude of advantages, making it a compelling option for many.
- Cost Savings: A high-quality pair of boots can be a significant investment. Boot sole replacement typically costs between $80 and $150, making it significantly more affordable than purchasing a new pair of quality boots, which can range from $150 to $500 or more. A half-sole replacement, addressing wear only on the front part of the sole, can cost between $35 and $70, offering an even more budget-friendly option for partial repairs.
- Environmental Impact: Resoling is a sustainable practice. By extending the life of your existing footwear, you reduce waste destined for landfills and decrease the demand for new materials and manufacturing processes, which consume energy and resources.
- Preserving Broken-in Comfort: One of the greatest benefits is keeping that perfectly broken-in upper. Well-worn boots often mold to the shape of your feet, providing unparalleled comfort and a custom fit that new boots simply can’t match right out of the box. Resoling allows you to retain this comfort while giving the boot a fresh, durable foundation.
- Maintaining Quality Footwear: If you own boots made with premium leather and quality construction, the upper can last for decades. Resoling ensures that the most vulnerable part of the boot – the sole – can be replaced multiple times, allowing you to enjoy your high-quality investment for many years.
Types of Boots That Can Be Resoled
Not all boots are created equal when it comes to their ability to be resoled. The construction method used to attach the sole to the upper is the primary determinant.
- Goodyear Welt Construction: This is considered the gold standard for resoleability. A Goodyear welt involves a strip of leather, rubber, or plastic (the “welt”) that is stitched to both the upper and the insole, and then the outsole is stitched to the welt. This creates a highly durable and easily replaceable sole, as the stitching that attaches the sole does not penetrate the insole or upper directly. Many high-quality dress boots, work boots, and some hiking boots use this method.
- Stitch-down Construction: Similar to Goodyear welt, stitch-down construction involves the upper being flared outwards and stitched directly to the midsole and outsole. This method also makes resoling relatively straightforward, as the sole can be removed without damaging the upper. Many heritage work boots and Pacific Northwest-style boots use this robust construction.
- Molded or Cemented Soles: These boots have soles that are glued directly to the upper. While common in athletic shoes and many modern casual boots due to lower manufacturing costs and lighter weight, they are generally more difficult, and sometimes impossible, to resole professionally. The process often involves peeling off the old sole, which can damage the upper, and it’s challenging to achieve the same durable bond as the original factory adhesive. However, minor repairs or re-adhering a delaminated section might be possible.
Common Resoleable Boot Types:
- Hiking Boots: Especially those designed for rugged terrain, often feature Goodyear welt or stitch-down construction, allowing for multiple sole replacements to maintain grip and support on trails.
- Work Boots: Many heavy-duty work boots, particularly those from reputable brands, are built to be resoled, ensuring longevity in demanding environments.
- Western Boots: Traditional cowboy boots are almost always constructed with a Goodyear welt, making them highly resoleable. This is a key reason why western boot owners can cherish their favorite pairs for decades.
- Dress Boots: High-quality leather dress boots, such as Oxfords, Derbies, and Chelsea boots, typically feature Goodyear welt construction, allowing for neat and durable resoling that preserves their classic style.
The Sustainability Angle of Repairing Footwear
In an era where fast fashion and disposable goods dominate, choosing boot sole replacement is a powerful statement for sustainability. It’s more than just a repair; it’s an active step towards a more circular economy and a reduced environmental footprint.
- Reducing Landfill Waste: Every pair of boots resoled is one less pair contributing to the growing mountains of textile and material waste in landfills. Footwear, often made from a complex mix of materials, can take hundreds of years to decompose. By extending the usable life of boots, we directly divert waste.
- Lowering Carbon Footprint: Manufacturing new boots requires significant energy, water, and raw materials, from raising livestock for leather to producing synthetic rubbers and plastics. Resoling, in contrast, uses a fraction of these resources. The energy saved from not producing a new pair of boots, including the processes of sourcing, manufacturing, and transportation, contributes to a lower carbon footprint. As highlighted in a recent Reuters article, even major bootmakers like Dr. Martens are embracing repair services as part of their sustainability initiatives, recognizing the environmental benefits.
- Supporting Craftsmanship and Local Economies: Opting for repair often means supporting skilled cobblers and local businesses. This fosters traditional craftsmanship and keeps valuable skills alive, contributing to local economies rather than relying solely on mass production. It also encourages a mindset of valuing and caring for possessions, rather than treating them as disposable.
By choosing to resole, we not only save money and maintain comfort but also make a tangible positive impact on the environment. It’s a simple yet effective way to participate in the circular economy, where products are kept in use for as long as possible.
DIY vs. Professional Resoling: Making the Right Choice
When faced with worn-out boot soles, the decision often boils down to two paths: attempting a DIY repair or entrusting your beloved boots to a professional cobbler. Each approach has its merits and drawbacks, and the best choice depends on several factors, including the type of boot, the extent of the damage, your skill level, and your budget.
Feature DIY Boot Sole Replacement Professional Boot Sole Replacement Cost Low ($8-$20 for kits/adhesives) Moderate to High ($80-$150 for full resole, $35-$70 for half-sole) Quality Varies greatly; often temporary or cosmetic High; durable, factory-like finish, precise Time Quick application (minutes to hours), but long cure time Weeks (3-4 weeks typical turnaround for mail-in) Skill Required Basic handiwork, patience, attention to detail Specialized training, extensive experience, professional tools Tools/Materials Basic (knife, sandpaper, clamps, adhesive) Industrial (grinders, presses, stitching machines, specialized glues) Durability Can be short-lived, prone to re-separation Long-lasting, often comparable to or exceeding original sole life Risk Potential for irreversible damage, aesthetic flaws Low risk of damage, guaranteed results from reputable cobblers Choosing the right method often depends on the value you place on your boots. For high-value boots, especially those with sentimental value or complex construction (like Goodyear welted or stitch-down boots), professional resoling is almost always the superior choice. A professional can ensure the structural integrity is maintained, the correct materials are used, and the aesthetic appeal is preserved. For less expensive boots, or if you’re just looking for a temporary fix for a minor issue, DIY can be a viable, cost-effective option.
The DIY Approach to Boot Sole Replacement
For those with a knack for hands-on projects and a desire to save money, DIY boot sole replacement can be an appealing option. While a full, durable resole is best left to professionals, minor repairs or re-adhering a delaminated section can often be tackled at home.
Necessary Tools and Materials:
- Replacement Soles: These can be found online (e.g., eBay or Amazon offer DIY boot resole kits and replacement soles for as little as $8–$20 per pair) or at some cobbler supply stores. Choose soles that match the original type or are suitable for your boot’s construction.
- Strong Adhesive:Barge Cement: A popular contact cement known for its strong, flexible bond, especially in shoe repair. It comes in different formulations (toluene-based yellow tube vs. toluene-free blue tube).
- Shoe Goo: A versatile, flexible, and waterproof adhesive often recommended for minor repairs, sealing cracks, or re-attaching small sections of sole.
- Gorilla Glue (or similar polyurethane adhesive): Can be effective for some repairs, but requires moisture to cure and expands, so careful application is needed.
- Utility Knife or Razor Blade: For trimming excess sole material and removing old, loose sole pieces.
- Sandpaper or Wire Brush: For roughening surfaces to improve adhesive bond.
- Clamps or Heavy Objects: To apply consistent pressure during the adhesive curing process.
- Heat Gun or Hair Dryer: To soften old adhesive and activate new adhesives for better bonding (use with caution).
- Acetone or Rubbing Alcohol: For cleaning and degreasing surfaces before applying adhesive.
- Gloves and Ventilation: Essential for safety, especially when working with strong adhesives.
Common Mistakes to Avoid:
- Inadequate Surface Preparation: This is perhaps the most critical step. Surfaces must be thoroughly cleaned, dried, and roughened. Any dirt, grease, or old adhesive residue will prevent a strong bond. If you skip this, your new sole will likely peel off quickly.
- Improper Adhesive Application: Don’t use too little or too much. Follow the adhesive manufacturer’s instructions precisely regarding application thickness, drying time before joining (for contact cements), and curing time.
- Insufficient Curing Time: Rushing the curing process is a common mistake. Most strong adhesives require at least 24-48 hours under pressure to achieve maximum bond strength. Removing clamps too soon can lead to a weak, short-lived repair.
- Lack of Pressure: Simply applying glue isn’t enough. You need to apply firm, even pressure across the entire bonded area while the adhesive cures. Clamps, heavy books, or even tightly wrapped tape can help.
- Choosing the Wrong Adhesive: Not all glues are suitable for boot soles. You need a flexible, waterproof adhesive that can withstand the stresses of walking. For a detailed look at a DIY approach, including adhesive choices and application techniques, you might find this DIY boot sole repair tutorial helpful.
While DIY can be satisfying for small fixes, understand its limitations. For a full, durable resole, especially on high-quality or complex boots, professional services offer a level of expertise and specialized equipment that is hard to replicate at home.
What to Expect from a Professional Cobbler
When you opt for professional boot sole replacement, you’re investing in expertise, specialized tools, and a durable, lasting repair that often makes your boots feel “better than new.” This is particularly true for boots with Goodyear welt or stitch-down construction.
The Professional Process:
- Assessment and Consultation: A reputable cobbler will first inspect your boots to determine the extent of the wear, the construction method, and whether they are suitable for resoling. They’ll discuss sole material options and any additional repairs needed (e.g., stitching, heel repair, leather conditioning).
- Sole Removal: Using specialized tools, the cobbler carefully removes the worn-out sole. For welted boots, this involves cutting the stitching that attaches the outsole to the welt, leaving the upper and insole intact.
- Welt Inspection and Repair: The welt itself is inspected for damage. If necessary, it can be repaired or replaced.
- Cork Replacement (for welted boots): The cork filling between the insole and midsole (which molds to your foot over time) is often replaced. This restores cushioning and allows for a fresh, custom footbed as the new cork conforms to your foot.
- Midsole and Shank Work: Any damaged midsoles are replaced, and the shank (a rigid support piece in the arch) is checked and replaced if broken or worn.
- New Sole Attachment: The new sole is carefully shaped and then securely attached. For welted boots, this involves stitching the new sole to the existing or new welt. For other constructions, powerful industrial adhesives and presses are used.
- Heel Replacement: The heel block and heel cap are replaced, ensuring proper height and balance.
- Finishing Touches: The new sole and heel are trimmed, sanded, and polished to a professional finish, often restoring the boot’s original aesthetic. The upper may also be cleaned, conditioned, and polished.
Finding a Reputable Service:
- Ask for Recommendations: Word-of-mouth from friends, family, or online communities (especially those focused on quality footwear) can lead you to trusted cobblers.
- Check Online Reviews: Google Maps, Yelp, and other review platforms can provide insights into a cobbler’s reputation, quality of work, and customer service.
- Inspect Their Work: If possible, visit their shop and look at examples of their finished work. A good cobbler will be proud to show off their craftsmanship.
- Inquire About Materials: A reputable cobbler will use high-quality materials (like genuine Vibram soles, quality leather, etc.) and be transparent about their sourcing.
Mail-in Repair Services:
For those without access to a local, high-quality cobbler, mail-in repair services have become a popular and convenient option. Companies like The Cobblers (as detailed in this Forbes article on mail-in restoration) allow you to ship your boots to their facility, where expert craftsmen perform the repair and then ship them back to you. This is particularly beneficial for specialty boots or if you live in a rural area. The process typically involves:
- Online Assessment: Submitting photos and a description of the damage.
- Quotation: Receiving a detailed quote for the services.
- Shipping: Mailing your boots to the repair facility.
- Repair: The boots undergo the professional resoling process.
- Return Shipping: Your repaired boots are shipped back to your doorstep.
Mail-in services often provide tracking and insurance, offering peace of mind for your valuable footwear.
A Guide to Specialized Boot Sole Replacement Materials
Choosing the right replacement sole is about more than just finding one that fits; it’s about optimizing your boots for their intended use, the terrain you’ll encounter, and your personal preferences for durability versus comfort. A professional cobbler can guide you through these choices, ensuring the new sole improves your boot’s performance.

When selecting a sole, consider:
- Boot Usage: Are these for heavy-duty work, casual wear, hiking, or dress? Each activity demands different sole properties.
- Terrain: Will you be on slippery surfaces, rocky trails, concrete, or soft ground? Traction patterns vary significantly.
- Durability vs. Comfort: Some materials offer extreme durability but might be stiffer, while others prioritize cushioning but may wear faster.
Common Sole Materials and Their Uses
- Vibram Soles: Perhaps the most renowned name in performance outsoles, Vibram produces a wide range of rubber compounds and lug patterns.
- Uses: Widely used for hiking boots, work boots, and outdoor footwear due to their exceptional grip, abrasion resistance, and durability on various terrains. Different Vibram compounds offer varying levels of hardness, stickiness, and temperature resistance.
- Rubber Compounds (Generic): Beyond Vibram, many manufacturers produce their own rubber soles.
- Uses: Versatile and common for everyday boots, casual wear, and some work boots. They offer good traction and durability, often at a more affordable price point than specialized Vibram options.
- Leather Soles: A traditional material prized for its breathability, classic aesthetic, and ability to mold to the foot over time.
- Uses: Primarily found on dress boots, cowboy boots, and some heritage work boots. Leather soles offer good flexibility and a sleek profile but can be slippery on wet surfaces and wear faster than rubber. They can also be combined with rubber inserts for improved traction.
- Crepe Soles: Made from natural rubber, crepe soles are characterized by their soft, bouncy, and somewhat sticky texture.
- Uses: Popular for desert boots, chukka boots, and some casual footwear. They offer excellent shock absorption and comfort but are less durable than other rubber types, prone to picking up dirt, and can degrade with oil exposure.
- Polyurethane (PU) Soles: A synthetic material known for being lightweight, flexible, and having good shock absorption.
- Uses: Often found in modern work boots and some casual footwear. PU soles can be very comfortable but are susceptible to hydrolysis (breaking down over time, becoming crumbly) and can be difficult to bond with certain adhesives for repair.
- EVA Foam Midsoles: Ethylene-vinyl acetate foam is a lightweight, flexible material primarily used for cushioning and shock absorption.
- Uses: Common in athletic footwear and the midsole layer of many hiking and work boots. While not typically used as an outsole, their integrity is crucial for comfort and support, and they can sometimes be replaced as part of a comprehensive resole.
Choosing a Sole for Specific Boot Types
The choice of sole material is highly dependent on the boot’s function:
- Work Boots: Durability and traction are paramount. Heavy-duty rubber compounds, especially Vibram lug soles (like the Vibram 100 or 1276), are popular choices for their oil-slip resistance, heat resistance, and aggressive grip on challenging surfaces.
- Hiking Boots: Grip on varied terrain, cushioning, and durability are key. Vibram soles with multi-directional lugs are favored for their traction on wet rocks, mud, and uneven trails.
- Western Boots: Traditionalists often prefer leather soles for their classic look and feel. However, many opt for a combination of leather with a rubber heel cap or a full rubber sole for improved durability and traction on concrete or slick surfaces.
- Motorcycle Boots: Require soles with excellent grip, abrasion resistance, and often a relatively flat profile to prevent snagging on footpegs. Specialized rubber compounds designed for motorcycle use are common.
For those seeking to truly optimize their footwear, we offer Specialized boot sole replacement services that allow for customization. This means you can choose a sole that not only replaces the worn-out one but also upgrades your boot’s performance for your specific needs, whether it’s improved grip, improved cushioning, or greater durability. This level of customization ensures your boots are perfectly suited for your adventures.
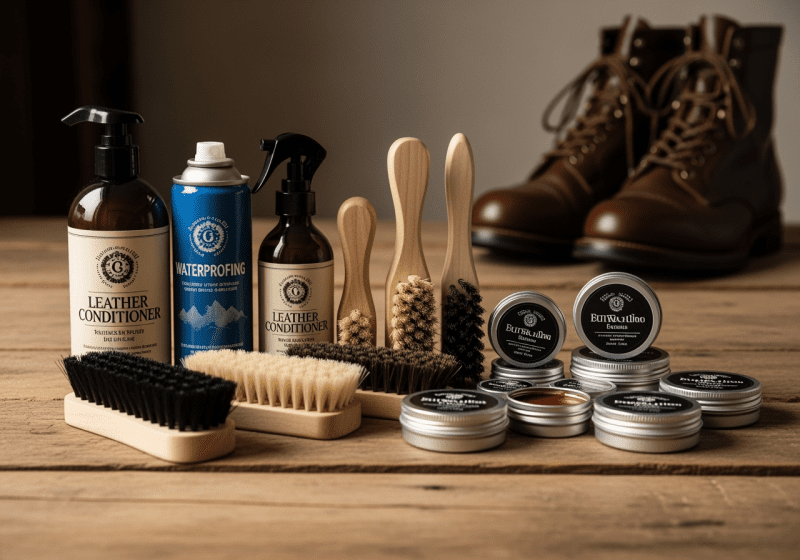
Post-Repair Care and Maintenance
Once your boots have been resoled, whether by a professional or through a successful DIY attempt, proper care and maintenance are essential to maximize the lifespan of your new soles and the boots themselves. Think of it as protecting your investment and ensuring your boots continue to perform optimally.
Key Practices for Maximizing Lifespan:
- Regular Cleaning: Dirt, mud, and debris can accelerate wear on soles and uppers. Clean your boots regularly with a stiff brush and appropriate cleaners for the material (leather cleaner, suede cleaner, etc.). Pay attention to the crevices in the sole where grit can accumulate.
- Conditioning Leather Uppers: For leather boots, conditioning is vital. Leather can dry out, crack, and lose its suppleness, which can also affect how well it holds the sole. Use a quality leather conditioner or oil to keep the leather nourished and flexible.
- Waterproofing: Apply a suitable waterproofing spray or wax, especially if your boots are exposed to wet conditions. This protects both the upper and the adhesive bonds of the sole from moisture damage. While new soles are robust, consistent exposure to water can weaken adhesives and degrade sole materials over time.
- Proper Storage: Store your boots in a cool, dry, well-ventilated area away from direct sunlight and extreme temperatures. Avoid storing them in damp basements or hot attics. Using cedar boot trees can help absorb moisture, maintain the boot’s shape, and prevent odors.
Maintaining Your Newly Resoled Boots
Beyond general care, specific attention to your newly resoled boots will ensure they last even longer.
- Regular Inspection: Periodically inspect your new soles for early signs of wear, especially on the heel and toe. Catching minor wear early can allow for small, inexpensive repairs (like replacing just a heel cap or adding a toe tap) before a full resole is needed again.
- Heel Cap Replacement: The heel cap is often the first part of a sole to wear down. Replacing just the rubber heel cap is much cheaper and easier than a full resole and can be done multiple times.
- Avoiding Extreme Heat: High heat can weaken adhesives and cause some sole materials (especially rubber and EVA) to degrade, soften, or even melt. Avoid drying your boots near direct heat sources like radiators, fireplaces, or clothes dryers.
- Rotation with Other Pairs: If possible, rotate between a few pairs of boots or shoes. This allows each pair to fully dry out between wears, preventing moisture build-up that can lead to odor, material degradation, and sole delamination. It also reduces the frequency of wear on any single pair, extending the life of your resoled boots.
By integrating these care practices into your routine, you can significantly prolong the life of your resoled boots, ensuring they remain comfortable, functional, and stylish for many more years and adventures.
What to Do If Your Boots Cannot Be Repaired
While boot sole replacement is a fantastic option for extending the life of quality footwear, there are instances where boots simply cannot be repaired. Understanding these limitations can save you time, money, and disappointment.
Understanding Irreparable Damage:
Professional cobblers are highly skilled, but even they have limits. Boots may be deemed unrepairable if:
- Cracked or Severely Damaged Uppers: If the leather or fabric upper is extensively torn, cracked beyond repair, or has deteriorated to the point where it cannot hold stitching or withstand the resoling process, the boot’s foundation is compromised. This is especially true for synthetic uppers that aren’t designed for repair.
- Damaged Insoles: The insole is the internal foundation of the boot. If it’s cracked, warped, or severely deteriorated, it may not provide a stable base for a new sole, making repair impractical or impossible.
- Worn-Out Welts (for welted boots): While welts can often be replaced, if the original welt is completely destroyed or if the boot’s construction makes welt replacement unfeasible, a resole becomes impossible.
- Molded or Cemented Construction: As mentioned earlier, boots with soles glued directly onto the upper can be difficult to resole, especially if the upper material is fragile or if the original adhesive bond is so strong that removal would destroy the boot.
- Specialized or Proprietary Designs: Some highly specialized boots (e.g., certain athletic or safety boots) may have integrated sole designs that cannot be replicated or replaced with aftermarket options.
What Happens if Boots Cannot Be Repaired?
Reputable repair services will typically inform you upfront if your boots are beyond repair. For example, many mail-in services will:
- Provide an Explanation Letter: You’ll receive a detailed explanation outlining why the boots cannot be repaired, often including specific damages that make repair impossible.
- Return Process: The boots will be sent back to you, and any payment made for the repair will typically be refunded. For instance, services like Red Wing Shoe Co. have clear policies for returning unrepairable boots.
Alternative Options for Unrepairable Boots:
If your beloved boots have reached the end of their functional life, consider these alternatives:
- Recycling Footwear: Some shoe brands and retailers offer recycling programs for old footwear. Look for local textile recycling centers or specialized shoe recycling initiatives in your area.
- Upcycling/Repurposing: If the uppers are still aesthetically pleasing, consider repurposing them for decorative items, planters, or craft projects.
- Ethical Disposal: If recycling or repurposing isn’t an option, dispose of them responsibly according to local waste management guidelines.
While it’s sad to part with a favorite pair, understanding when to let go and exploring responsible alternatives is part of sustainable footwear ownership.
Frequently Asked Questions about Boot Sole Replacement
We’ve covered a lot of ground, but some common questions often arise when considering boot sole replacement. Let’s address them directly.
How much does boot sole replacement typically cost?
The cost of boot sole replacement can vary significantly based on several factors, including the type of boot, the materials used, the complexity of the repair, and whether you choose DIY or professional services.
- Professional Full Resole: This typically costs between $80 and $150. This price usually includes removing the old sole, replacing it with a new one, and often includes a new heel. Professional repair services like NuShoe offer a Premium Repair Package for $150, which includes resoling, heel replacement, minor stitching repairs, new laces, and leather reconditioning, providing a comprehensive refresh.
- Half-Sole Replacement: If only the front part of your sole is worn, a half-sole replacement can be a more affordable option, costing between $35 and $70.
- Heel Replacement: Replacing just the heel can range from $25 to $50, depending on the material and complexity.
- Factors Affecting Price:Material Choice: Premium materials like Vibram lug soles or high-quality leather will cost more than standard rubber or synthetic options.
- Boot Construction: Welted boots are generally easier (and thus sometimes less expensive) to resole than cemented boots, which require more delicate work.
- Labor Complexity: Extensive damage to the welt, insole, or upper can increase labor costs.
- Cobbler’s Reputation/Location: Highly experienced cobblers or those in metropolitan areas may charge more.
- DIY Cost: As noted earlier, DIY kits and adhesives are significantly cheaper, often ranging from $8–$20 per pair. However, this doesn’t account for your time, potential mistakes, or the often-lower durability compared to professional work.
In most cases, professional resoling remains a highly cost-effective solution compared to purchasing a new pair of quality boots, which can easily run into several hundred dollars.
Can you replace just the heel or part of the sole, or does the whole sole need to be replaced?
Yes, absolutely! You can often replace just the heel or a specific part of the sole, depending on the wear pattern and the boot’s construction. This is a common and cost-effective approach for partial repairs.
- Half-Sole Replacement: If the wear is primarily concentrated on the ball of the foot and the toe area, but the heel and arch are still in good condition, a cobbler can perform a half-sole replacement. This involves removing and replacing only the front portion of the sole, typically from the arch forward. It’s a great option for extending the life of boots where only specific areas see heavy friction.
- Heel Replacement: The heel is often the first part of a boot to wear down due to impact and friction. Cobblers can easily remove the worn-out heel cap and replace it with a new one, matching the original material or upgrading to a more durable option. If the entire heel block is damaged, that can also be replaced.
- Taps and Heel Guards: For very minor wear or as a preventative measure, small rubber or metal “taps” can be added to the toe or heel to protect these high-wear areas.
- When Partial Repair Is Appropriate: Partial repairs are ideal when the majority of the sole is still in good condition, the wear is localized, and the boot’s overall structure (upper, insole, welt) is sound. A cobbler can assess whether a partial repair is sufficient or if a full resole is necessary for optimal longevity and performance.
How long does a replacement sole last compared to the original sole?
The lifespan of a replacement sole can vary widely, but in many cases, a professionally installed replacement sole can last as long as, or even longer than, the original sole.
- Durability Factors:Sole Material Quality: Professional cobblers often use high-quality, durable materials (like genuine Vibram compounds or premium leather) that may be superior to the original factory sole, especially on mid-range boots.
- Usage Patterns: How you use your boots (e.g., daily wear on concrete vs. occasional hiking on soft trails) will significantly impact sole longevity. Heavy use, especially on abrasive surfaces, will naturally lead to faster wear.
- Walking Gait: Your individual walking style can create uneven wear patterns. A cobbler might even suggest a more durable material or a different heel shape to compensate for this.
- Professional vs. DIY Quality: Professional resoles are typically much more durable than DIY repairs due to the use of industrial-strength adhesives, specialized machinery (like stitching machines and presses), and the cobbler’s expertise in preparing surfaces and applying materials. DIY repairs, while cost-effective, often serve as temporary fixes.
- Maintenance Impact: Regular cleaning, conditioning, and prompt attention to minor wear (like replacing heel caps) can significantly extend the life of your resoled boots.
While it’s difficult to give an exact number of years, a well-executed professional resole on a quality boot can add several years, if not a decade or more, to its life, making it a truly worthwhile investment.
Conclusion
Boot sole replacement is a game-changer for anyone who cherishes their quality footwear. It’s a testament to valuing craftsmanship, embracing sustainability, and making smart financial decisions. We’ve explored the clear signs that your boots need attention, the compelling benefits of resoling over buying new, and the critical differences between DIY and professional approaches.
From understanding the various sole materials to mastering post-repair care, the journey of boot sole replacement empowers you to extend the life of your favorite pairs. It’s an investment that pays dividends in comfort, cost savings, and a reduced environmental footprint.
So, before you discard that beloved pair of boots with worn-out soles, consider the power of repair. Whether you choose to start on a careful DIY project or entrust them to the skilled hands of a professional cobbler, giving your boots a new lease on life is a decision you won’t regret. Step up your game, protect your investment, and walk confidently knowing you’ve made a smart, sustainable choice. For expert craftsmanship and a wide range of options, consider exploring specialized boot sole replacement services that can breathe new life into your cherished footwear.