
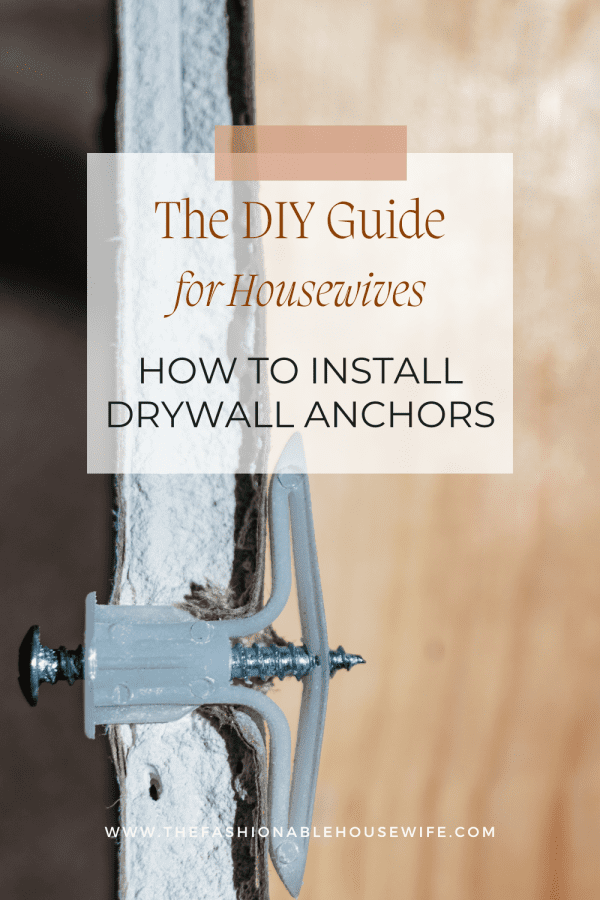
How to Install Drywall Anchors – The DIY Guide for Housewives
Ever find yourself gazing at a blank wall, visualizing the art or shelves you’d love to hang, only to be halted by the question of how to secure them? Drywall anchors are the unsung heroes in these moments, providing the support your decorations and fixtures need without the need for studs.
However, not all anchors are created equal, and proper installation is key to ensuring they hold. Luckily, you’re in the right place. This guide demystifies the process, ensuring you can confidently install drywall anchors and bring your wall dreams to life.
Preparing for Drywall Anchor Installation
Before anchoring anything, it’s crucial to gather your tools and know-how. A seamless installation starts with preparation, and understanding the steps ahead will make the process a breeze. Let’s get everything in place so you can securely attach anything from picture frames to bookshelves.
Assessing Your Wall Type and Conditions
To ensure your drywall anchors hold properly, you must first assess the type of drywall you have.
Standard drywall typically comes in 1/2-inch or 5/8-inch thickness, which can influence the choice of anchor. Additionally, consider the condition of your wall; is it new and untouched, or has it seen years of decor changes? Inspect for any areas that may have been weakened or damaged, as this will affect anchor placement and performance.
It’s also important to recognize that while most interior walls feature drywall, some may have different surface materials like plaster or even tile, which may require special considerations such as how to drill through tile. Different wall types might necessitate different tools and techniques, so identifying what you’re working with is a crucial first step.
Essential Tools and Materials
Before you start, ensure you have the following essential tools and materials on hand:
- Drill and drill bits
- Screwdriver
- Stud finder (optional but helpful)
- Measuring tape
- Level
- Pencil or marker for marking drill points
- Drywall anchors and corresponding screws
- Safety goggles
Having these items ready will streamline your installation process, keeping it efficient and safe.
Step-by-Step Installation Process
Now that you have the right tools and knowledge, let’s walk through the installation process. A methodical approach will ensure your anchors are installed correctly and your items are secured.
- Marking the Anchor Points Precisely
Accuracy is key when marking the points where you’ll install the anchors. Use your measuring tape to find the exact spot and then a level to ensure that multiple points align correctly. Mark the spots lightly with a pencil; these marks are your roadmap to a successful installation.
- Drilling the Perfect Pilot Hole
A pilot hole guides the anchor into the wall, ensuring it fits snugly. Select a drill bit that corresponds to the size of your anchor; too small, and the anchor won’t fit, too large, and it won’t hold. Drill slowly and steadily for a clean hole.
- Choosing the Correct Drywall Anchor
Select an anchor that matches both the object’s weight and your wall’s condition for a secure hold.
Consider the environment, too. Areas prone to moisture, like bathrooms, may need anchors made from rust-resistant materials. It’s all about matching the anchor to both the weight of the object and the conditions it will face.
This choice is fundamental to the longevity of your installation.
- Toggle Bolts for Heavy Items
For heavy items, toggle bolts offer superior holding power. Their wings spread out behind the wall, distributing weight and reducing the risk of pull-through. They are ideal for supporting substantial loads like shelving units or large artwork.
- Threaded Anchors for Medium Loads
Threaded anchors, also known as self-drilling or screw-in anchors, are perfect for medium-weight items. Their deep threads provide a stronger grip than plastic expansion anchors, making them a reliable choice for moderately heavy objects.
- Plastic Expansion Anchors for Lighter Objects
Plastic expansion anchors are best suited for lighter objects. They expand against the drywall as the screw is driven in, creating a snug fit that’s ideal for small frames, clocks, or decorative items.
- Securing Objects
With your anchors in place, it’s time to secure your objects. This final step is about turning potential into reality as your walls come alive with the items that make your house a home.
- Ensuring a Tight Fit for Maximum Support
Drive the screw into the anchor, ensuring it’s tight enough to hold but not so tight that it damages the wall or anchor. A secure fit will ensure maximum support for your hung items, giving you peace of mind and a sense of accomplishment.
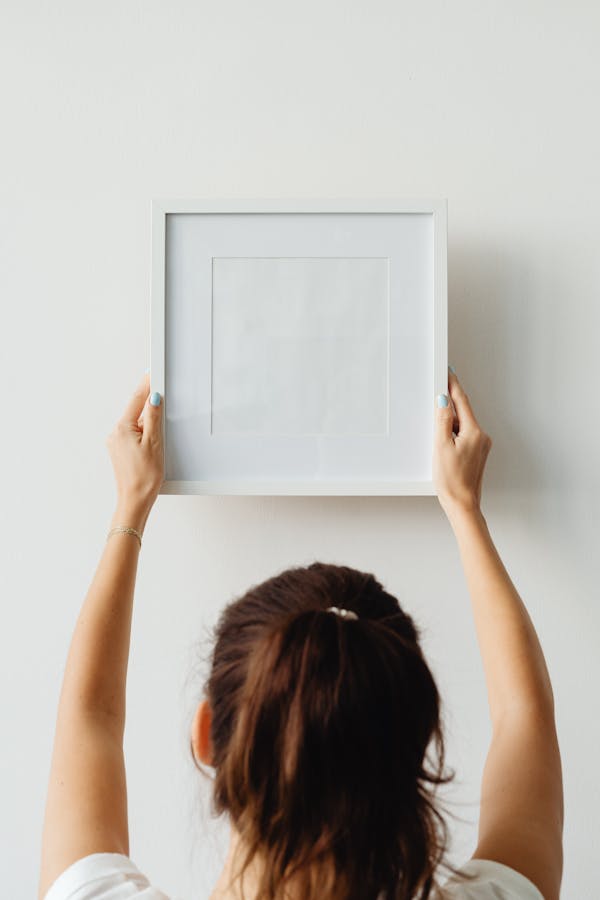
- Attaching Brackets, Shelves, and Artwork
Once your drywall anchors are securely in place, it’s time to attach your items. Begin by aligning the brackets or mounting hardware over the anchor points, ensuring they are level.
For shelves and artwork, use a screwdriver to fasten the included screws through the hardware and into the anchor, applying steady pressure to avoid stripping the screw head. If you’re hanging a heavy item, make sure to distribute the weight evenly across multiple anchors for added stability.
- Evaluating Your Drywall Anchor Installation
After installing your drywall anchors, take a step back to assess your work.
Check each anchor to ensure it’s flush with the wall and not protruding. Any gaps or movement could indicate an improper fit. If your anchors feel solid and are invisible behind the mounted item, you’ve likely achieved a successful installation.
Gently tug on the anchors to check for any give or looseness. Then, hang the item you intend to display and leave it for a short period to ensure the anchor can handle the weight. If there’s no sign of strain or movement from the wall, your anchors are doing their job.
The item you’ve hung should remain stationary and level without any tilting or shifting. You shouldn’t hear any creaks or see any bending of the anchor under the item’s weight.
Periodically check the area around the anchor for any signs of stress on the drywall, such as cracks or bulges. A well-installed anchor will show no such signs and will maintain its hold reliably over time.
Maintaining Safety and Precision
Ensuring safety and precision is crucial when installing drywall anchors. Always double-check your measurements before drilling, and wear protective eyewear to safeguard against debris.
By proceeding with caution and accuracy, you’ll reduce the risk of errors and create a secure foundation for your wall fixtures.
Avoiding Common Installation Mistakes
To avoid common mistakes, never rush the installation process. Verify that you’ve chosen the right type of anchor for your wall’s material and the item’s weight. Additionally, avoid overtightening the screws, as this can cause the anchor to fail. Make sure to read the manufacturer’s instructions carefully for the best results.
Precautions to Prevent Wall Damage
Preventing wall damage starts with proper anchor placement away from electrical wiring and plumbing. Use a stud finder to locate hidden obstacles and plan your installation accordingly. Additionally, drilling pilot holes slightly smaller than the anchor diameter can minimize wall stress and prevent cracks or crumbling.
What to Do If an Anchor Fails
If an anchor fails, carefully remove the loose hardware and assess the damage. For minor issues, you can use a slightly larger anchor to fill the existing hole. If the damage is more extensive, you may need to patch the drywall before trying again. Always replace failed anchors immediately to prevent further wall damage or potential injury from falling objects.
Advanced Techniques and Troubleshooting
Advanced techniques and troubleshooting are essential for handling unexpected challenges during drywall anchor installation. Be prepared to make adjustments and have a variety of tools on hand to address any issues that arise.
Adjusting for Uneven Walls
Uneven walls can complicate installation, but with a few adjustments, your anchors can still hold securely. Use shims to level out the mounting hardware before attaching your item. If the unevenness is due to texturing, consider sanding the area slightly to create a flat surface for the anchors.
What to Do When Anchors Get Stuck
If an anchor gets stuck, resist the urge to pull it out forcefully, as this can enlarge the hole and damage your wall. Instead, gently twist and pull the anchor using pliers. If it remains stuck, you may need to drill around the anchor carefully to release it without causing additional damage.
- How to Remove and Replace Drywall Anchors
To remove and replace a drywall anchor, first unscrew the hardware. If the anchor doesn’t come out with the screw, use needle-nose pliers to grip and pull it gently. Patch the hole with spackling compound before installing a new anchor, ensuring it’s the correct size and type for your project.
When to Consult a Professional Installer
Consider consulting a professional installer if you’re unsure about the wall’s capacity to hold weight, if you encounter electrical wiring, or if you’re dealing with an especially valuable or heavy item. A professional can ensure a safe, secure, and damage-free installation, providing peace of mind for your valuable home decor investments.
Final Thoughts
Mastering the installation of drywall anchors is a valuable skill that enhances your home’s functionality and aesthetic appeal. Whether you’re securing a family portrait or mounting a new shelf, the right anchor can make all the difference. By following the steps outlined and maintaining a cautious approach, you can achieve a stable and damage-free installation.
And if you’re ever faced with a different surface, like figuring out how to drill through tile, the principles of careful planning and execution still apply. With these final thoughts, you’re well on your way to confidently hanging items on your drywall with assurance and precision.