5 Best Ideas about Wedding Hairstyles for Every Length
Wedding season is never over and you should always keep in mind few ideas for the future wedding invitations. We have some special ideas for you , such as wedding updos for long hair as well as for short and others.
Wedding hairstyles for long hair
Twisted updo. Start with one side of your hair. Separate your hair into two sections and twist them towards your face, then bring the left section over the right one. Grab more hair into your right section underneath the left one and then cross it over from the top. Now your left section is underneath, so add more hair into it, twist it and cross it over the right one.
Keep doing it till all your hair from one side is in this twist and then keep it down as a ponytail. Try to pull it a bit, so the hair will have some fullness in its twist. Do the same thing to your o the side. And remember to twist it towards your face.
Once you’re done with the twist, start looking for the place you want to place it. Make it in a way that one of your twist will top another. Pull them to the top of your head and pin them to fixate, if you have too much hair on the top, try to hide the ending under the beginnings.
Crown braid. If your hair is long enough you can try to make a crown braid. In fact, it is actually a pretty easy hairstyle to try yourself. It will be even easier to make on straight hair. So start with deciding your hair on two sides and marketing two regular braids, better start them slightly behind your ear. Try to braid as far as you can and tie them up with a very thin elastic. It’s important. Once you are done, pull them up a little, to add some volume.
Once braids are done, start with lifting one of your braids up, as far or as close to the top of your head as you want. It might start with a little twist from the beginning of a braid, but it’s okay, you can pin the bottom of your braid after you finish with the top. Do the same thing with the other braid. Secure them with pins and use hair spray if you want. By the final feature, you might remove the elastic, since there is no need in them after pins and pull the pieces a bit harder, to make braids fuller.
Wedding hairstyles for medium hair
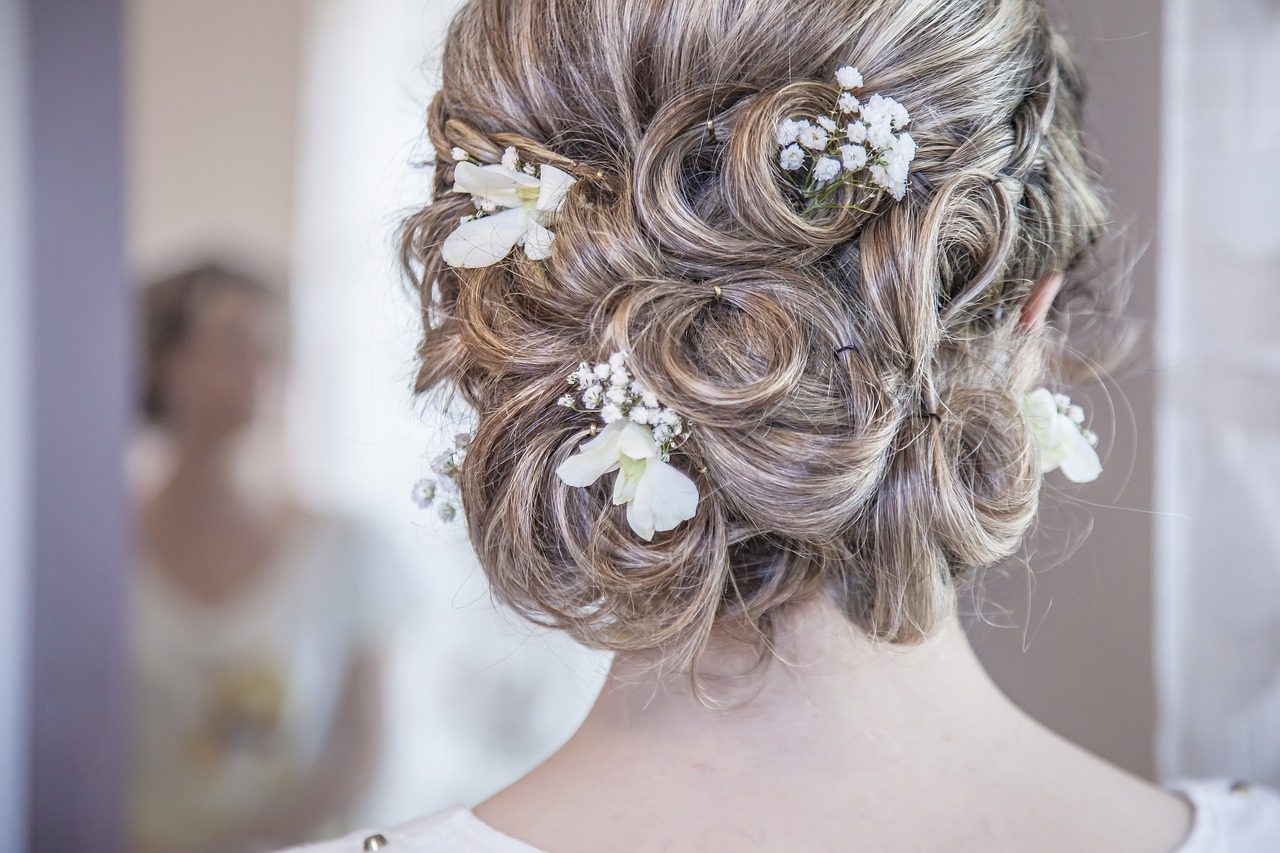
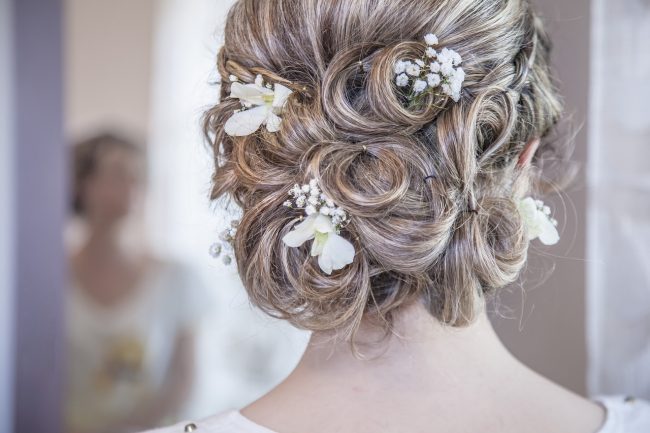
Wedding half updo. Start with curling your hair, make them as wide as you want. Consider that your work is half done if you naturally have perfect curls or wavy hair. Once your hair is nicely curled, decide your hair on two sectors. It is better to make separation just above the ears, so the braid will right at the crown of your head. The hair from the back section we will leave for now, it will be used for the bun.
The front sections we use to make a regular French braid, of course, if you have long hair, it might be easier to make a usual three strings braid. But for the medium length hair, French braids will be more appropriate and especially pretty. So now start to braid, take three strains like in the regular braid, but here, after each crossing, add a little more from the outside into the main string.
Keep doing so till you sure that the length of you French braid is enough to reach to the bun, then you can finish with the regular braid. To prevent it looking flat, you should toss up the parts of the braid so they will look softer and more voluminous.
Now the next step is up to you, but if you want to add extra volume to the hair at the top of your head, you can try to tease it a little at the roots. After that it would be better if you gather this top section together and tie it up in a tiny ponytail, just for security, keep it a bit loose.
And here is the main trick – put the tail upwards and fixate it with the bobby pins, kind of creating a half updo. And now do the same with the rest of your hair underneath the bun. You can separate them and twist before adding to the updo. Secure all the strings with the pins.
When the updo is almost ready, return to the front section and pull them to the bun as well. You might leave a single strain to frame your face. You can add any accessories into the braid, it’s all about you.
Waterfall bun. You should start with sectioning your hair. Divide it first into two part, leave a smaller section for the future braid, the rest of the hair just fixate behind, so it won’t bother you now. Stat work in working on your braid from the section above your ear, so you will finish at your other ear.
Divide the hair into three small sections and start to add nor hair in it along the work. Add and cross, that’s how the french braids are done. However, here is one turning point into this combination. You should release each new left strain and take new section of the hair instead, cross it into the middle. Keep braiding but leave all those small left pieces outside at the left.
Now once you finished with the braid and tied it with a small elastic, you should return to the left pieces of hair. Direct them all, including the ending of the braid, towards the ponytail and tie them up all together. But since we are not going here just for a ponytail, we are only half done.
Now you need to pick a hair tie and start to pull your hair. However, you don’t pull it through completely, but creating a loop, and then you pull it again and creating a loop again. As there is no place to pull it again, just stretch each of the loop out to create more volume, and after pin them to the roots of your hair
Wedding hairstyles for short hair
The messy bun trio. Divide your hair into three different sections. Make three little ponytails, but keep them close to each other. Now make a little bun where you have the first ponytail and secure it with pins. Turn other two ponytails into buns. The hairstyle will look better if you keep the middle bun slightly lower than the side ones.
Don’t worry if they don’t look perfect, if some of the sections are falling apart. We are going for the slightly messy look here, so it’s okay. In the end, if you have any fallen parts, you can always fix them with more bobby pins and use more hairspray to prevent it. If you want, just like in the previous hairstyle, you can add some flowers on the top of the buns.
Stay tuned with therighthairstyles for more inspiration, trends, and tutorials! We hope you enjoyed this tutorial and will recreate the waterfall braid without any problems.